Halloween Bark
When the leaves start to change and the air turns crisp, my mind drifts to one of my favorite treats: Halloween Bark. This delightful concoction brings back memories of making sweet surprises for friends and family. I remember the excitement of mixing colors, textures, and flavors, crafting something that feels festive and fun. Each bite bursts with chocolatey goodness and playful toppings that scream Halloween. It’s not just a dessert; it’s a celebration of the season, a canvas of creativity, and a great opportunity to indulge in sweets while bonding with loved ones. The best part? It’s incredibly easy to whip up, making it perfect for those busy autumn days filled with activities and gatherings.
Recipe Snapshot
60 mins
0 mins
0 mins
Easy
200 kcal
2 g
Keto, Gluten-Free, Low FODMAP
10 g
Kitchen Knife, Cutting Board
As Halloween approaches, I find myself eagerly planning a gathering where everyone can come together, share stories, and enjoy the magic of the season. And let’s be honest, what better way to capture that spirit than with homemade Halloween Bark? It’s an impressive yet simple treat that can be customized to your heart’s desire. From colorful candies to crunchy toppings, you can create a unique version that reflects your personality and tastes. So, let’s dive into why this Halloween Bark will become a staple at your autumn festivities!
Why This Halloween Bark Stands Out
1. Creative Expression
One of the best aspects of making Halloween Bark is the chance to unleash your creativity. Whether you prefer classic combinations or want to invent something new, the possibilities are endless. You can mix and match chocolates, add in your favorite toppings, or decorate with a Halloween theme that showcases your flair. This delicious treat becomes a canvas for your artistic side, allowing you to have fun while making it!
2. A Crowd-Pleaser
Everyone loves sweets, and Halloween Bark is a guaranteed hit at any gathering. It’s easy to share, and people can take as little or as much as they want. Plus, because it looks so festive, it becomes an instant conversation starter. Friends and family will marvel at your creation, and you’ll feel the joy of sharing something delightful with them.
3. Quick and Easy to Make
In our busy lives, finding time to bake can be a challenge. Fortunately, Halloween Bark is wonderfully simple and can be made in under an hour. You only need a few ingredients and minimal prep time. Just melt the chocolates, layer them, and throw in your toppings. It’s that easy! After a little time in the fridge, you’ll have a delicious treat ready to impress.
4. Perfect for Customization
Do you have dietary restrictions or personal preferences? No problem! Halloween Bark can be tailored to suit different needs. You can use dark chocolate for a richer flavor, swap in gluten-free crackers, or choose candies that align with your dietary choices. This versatility ensures everyone can enjoy a piece of your Halloween magic.
5. Engaging for Kids
If you have little ones, getting them involved in making Halloween Bark can be a fantastic way to create lasting memories. Kids love to help in the kitchen, and this treat is perfect for their participation. They can sprinkle toppings, break up chocolate, or even pick which colors they want to use. It’s a fun way to bond and teach them about cooking.
What Goes Into Halloween Bark
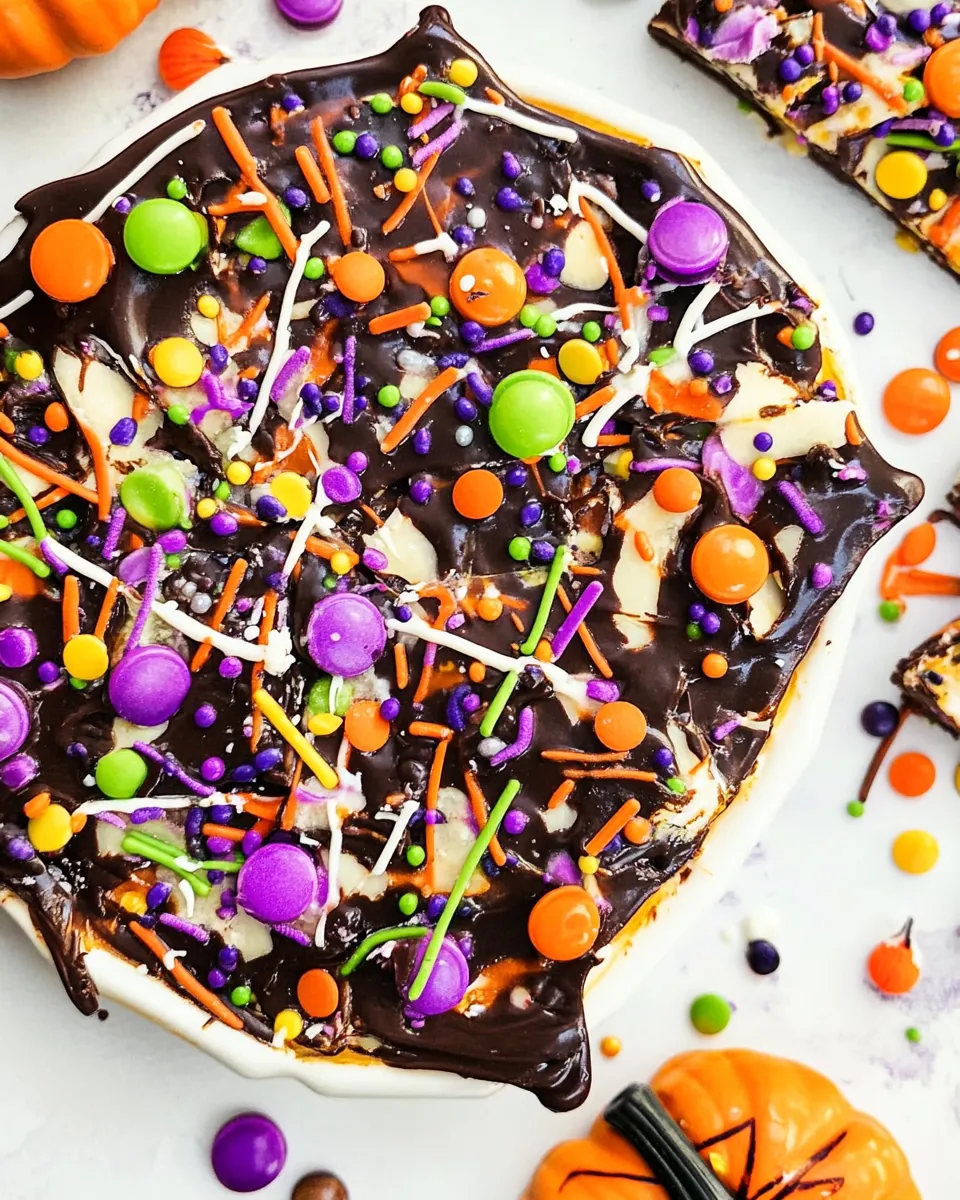
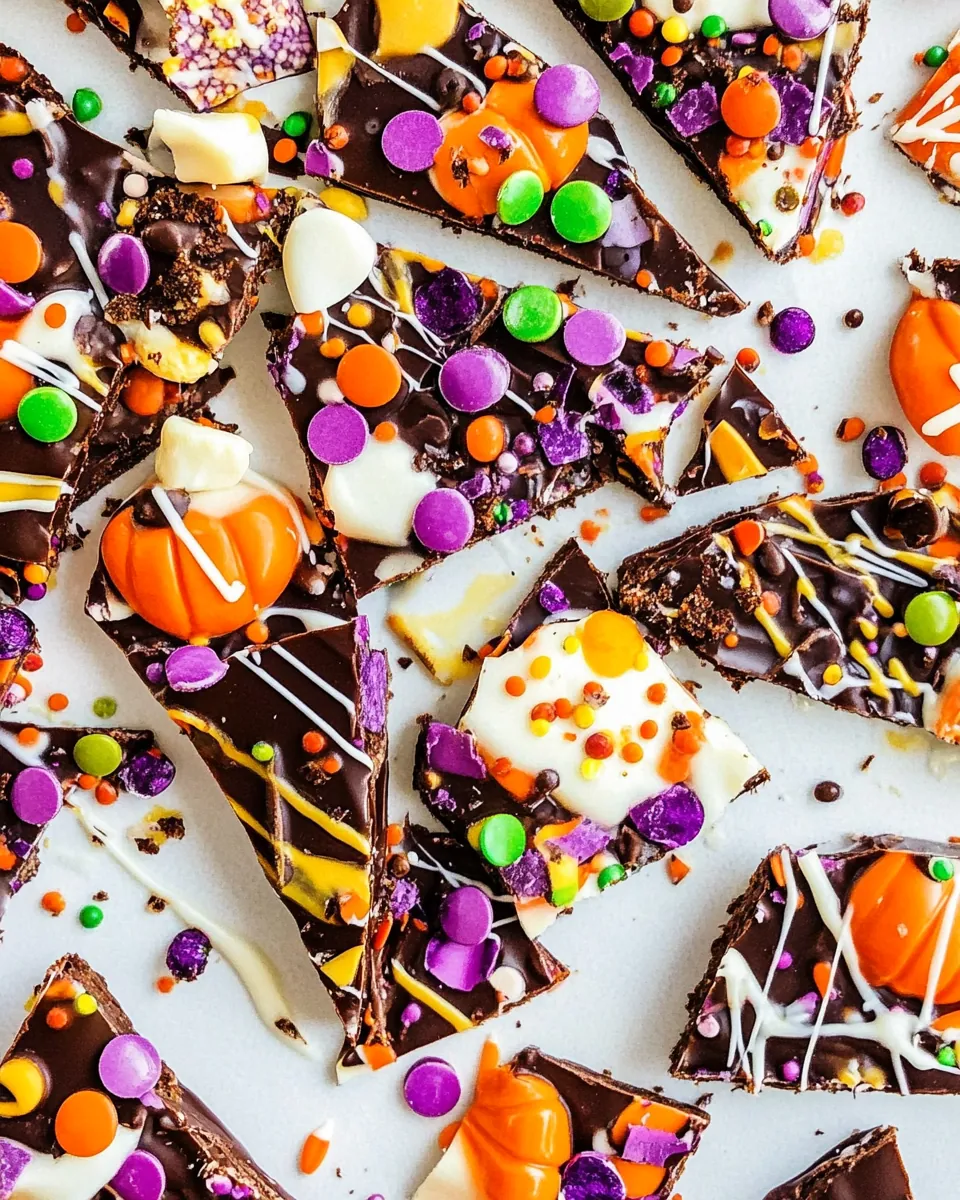
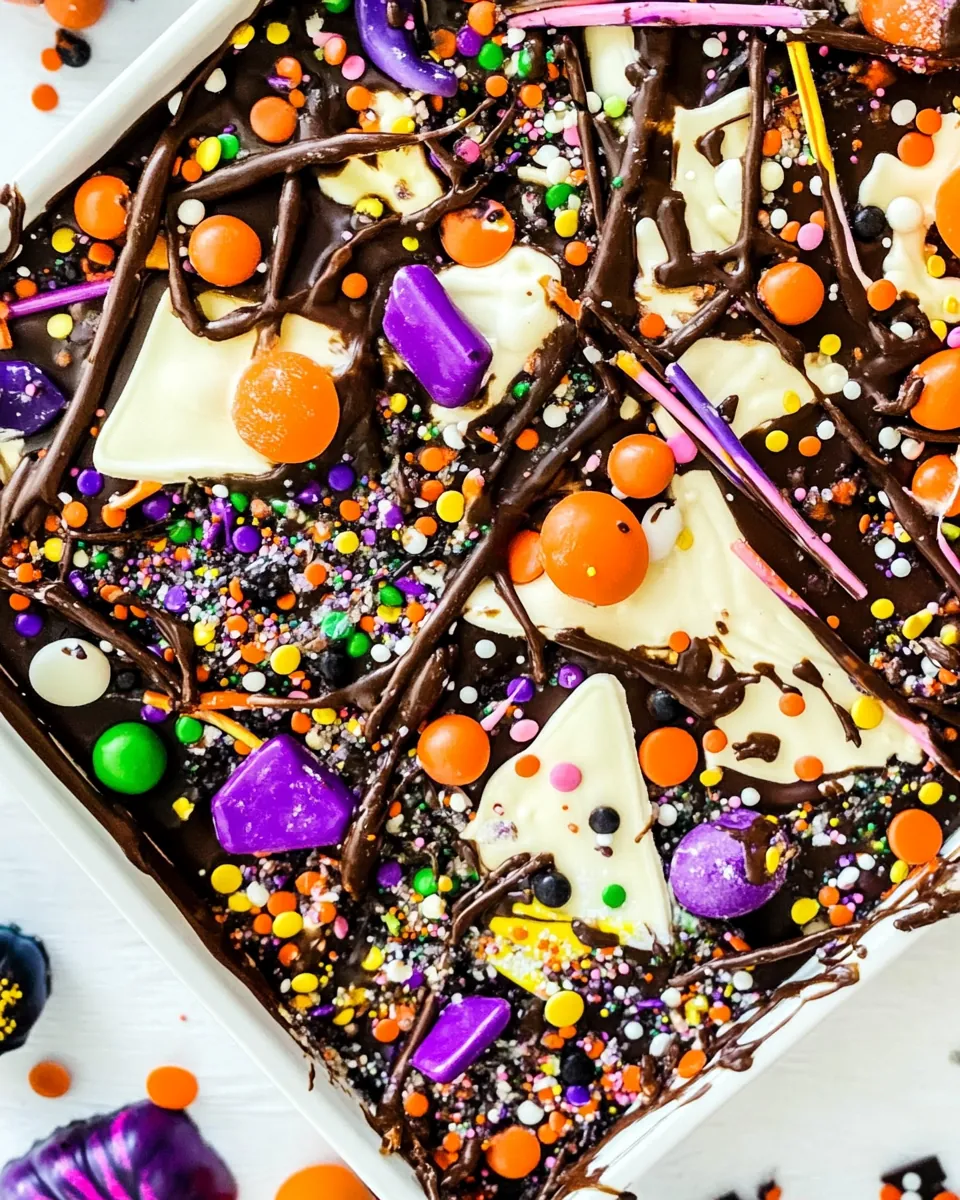
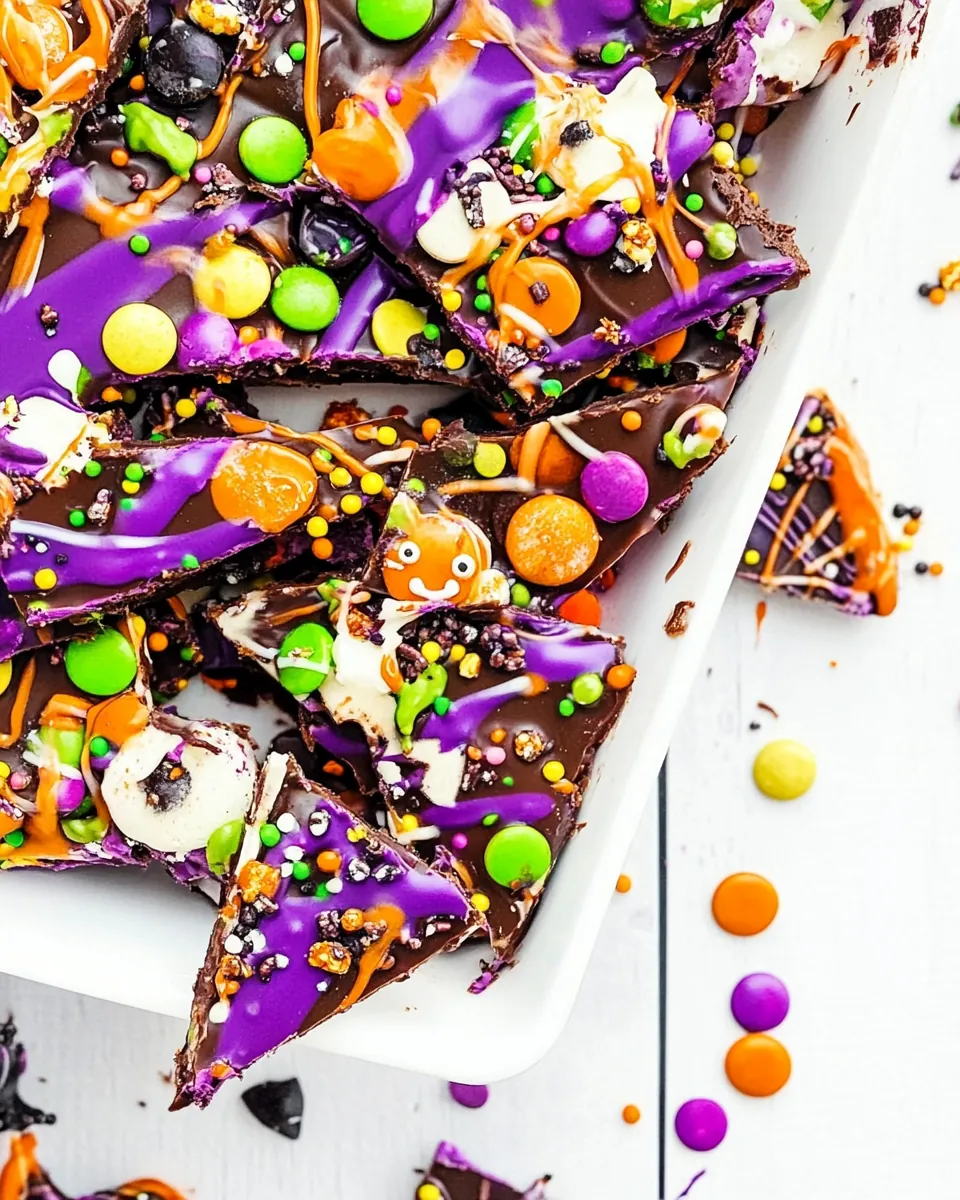
The ingredients for Halloween Bark are simple yet effective. Each ingredient plays a role in creating a delightful balance of flavors and textures. The base is made of graham crackers, providing a crunchy foundation, while the melted milk chocolate and white chocolate offer a rich and creamy sweetness. The toppings, like pretzels, M & Ms, sprinkles, and playful googly eye candies, add whimsy and a pop of color, making it a visual treat as much as a tasty one.
- 8 graham crackers: These crunchy layers form the base of your bark, offering a delightful texture contrast to the melted chocolates.
- 8 oz. milk chocolate, melted: Rich and creamy, this serves as the main chocolate layer that binds all the flavors together.
- 3 oz. white chocolate, melted: Adds sweetness and a lovely contrasting color, creating a beautiful marbled effect.
- Pretzels: Their salty crunch provides a wonderful contrast to the sweet chocolate, making each bite interesting.
- M & Ms: Perfect for adding festive color and a chewy texture, these candies are a classic topping for any Halloween treat.
- Sprinkles: These add a fun visual element and a touch of sweetness that enhances the overall experience.
- Googly eye candies: Nothing says Halloween like these fun decorations, adding a playful touch to your bark.
Cooking Instructions for Halloween Bark
Making Halloween Bark is just as easy as it is fun! Let’s dive into the step-by-step process to create this festive treat. Each step is straightforward, ensuring that you can whip it up in no time.
- Start by lining a 13” x 9.5” x 1” baking dish with a sheet of parchment paper. This will ensure that your Halloween Bark can be easily removed and cut into pieces later.
- Next, melt your milk chocolate in a microwave-safe bowl, heating it in 30-second intervals and stirring in between until completely smooth. The chocolate should be glossy and free of lumps.
- Once melted, pour the milk chocolate over the lined baking dish, spreading it evenly with a spatula to form a smooth layer. This will be the base of your bark.
- Now it’s time to melt the white chocolate in the same manner, ensuring it is fully melted and smooth. You can add a touch of food coloring if you want to get creative!
- Drizzle the white chocolate over the milk chocolate layer. Use a toothpick or a knife to swirl the two chocolates together for a marbled effect.
- Now, it’s time to get your toppings ready! Sprinkle the pretzels, M & Ms, sprinkles, and googly eye candies over the melted chocolate layers. Feel free to get creative with how you place them! This is where the fun really begins.
- After decorating, place the baking dish in the refrigerator for about 5 minutes. This will allow the chocolate to set firm, making it easier to slice.
- Once the chocolate has set, remove it from the refrigerator and lift it out using the parchment paper. Place it on a cutting board.
- Use a sharp knife to cut the bark into squares or rectangles, depending on your preference. The pieces should be fun and easy to handle.
- Finally, serve your Halloween Bark as a festive treat at your gatherings or simply enjoy it at home while watching spooky movies!
Things Worth Knowing
- Storage: Store any leftover Halloween Bark in an airtight container at room temperature. It should stay fresh for up to a week.
- Customization: Feel free to swap out toppings based on your preferences. Consider using nuts, dried fruits, or even different types of chocolate for variety!
- Serving Size: Each piece of Halloween Bark can be cut to your desired size. It’s perfect for sharing, so cut it small if you plan to serve it at a party.
- Festive Variations: To make it even more Halloween-themed, consider adding orange and black candies or even themed cookie crumbs!
- Perfect for Gifting: Wrap pieces of Halloween Bark in clear bags tied with a festive ribbon for a fun homemade gift!
Making Adjustments
While Halloween Bark is delicious as-is, there are many ways to make adjustments to suit your taste or occasion. Here are some handy tips to consider.
- Storage: Keep your Halloween Bark in an airtight container, and it will last for about a week at room temperature. If you want to keep it for longer, you can refrigerate it, though this may alter the texture slightly.
- Freezing: Yes, you can freeze the bark! Just make sure it’s well-wrapped in plastic wrap and then in foil to prevent freezer burn. It’ll last for up to three months.
- Pairing: Consider serving your Halloween Bark with a warm cup of cocoa or apple cider for a cozy treat on a chilly evening.
- Variations: Try using dark chocolate instead of milk chocolate for a richer flavor. You can also incorporate seasonal spices like cinnamon or nutmeg for a fall twist.
- Keepsakes: If you want to make it more decorative, use cookie cutters to shape the bark into fun Halloween-themed shapes!
What Complements This Halloween Bark
There are plenty of ways to enjoy your Halloween Bark that go beyond just serving it on its own. Consider these creative pairings and serving suggestions:
- Spooky Movie Night: Serve your Halloween Bark alongside popcorn and your favorite Halloween films for a cozy viewing experience.
- Halloween Parties: Display it on a festive platter with other treats and snacks to create a dazzling dessert table.
- Autumn Gatherings: Pair it with hot apple cider or pumpkin spice lattes to embrace the flavors of fall.
- Classroom Treats: If you’re sending treats to school, cut the bark into individual pieces and place them in Halloween-themed bags for a fun surprise!
- Gift Giving: Package the bark in cute containers or bags to give as gifts to friends and family during the Halloween season.
FAQ
Conclusion
This Halloween Bark brings together the excitement of Halloween with a delightful mix of flavors and textures, making it a must-try for the season. It’s easy to make, fun to customize, and sure to impress your family and friends. So why not whip up a batch today and create your own festive masterpiece? You’ll love sharing this treat with everyone around you!
Halloween Bark
Ingredients
Equipment
Method
- Line a 13” x 9.5” x 1” with a sheet of parchment paper. Layer with graham crackers and melted milk chocolate and white chocolate. Top with sprinkles, pretzels, M & Ms, and googly eyes.
- Refrigerate for 5 minutes until the chocolate sets. Serve once set.
Notes
- Storage: Keep your Halloween Bark in an airtight container, and it will last for about a week at room temperature.
- Freezing: Yes, you can freeze the bark! Just make sure it's well-wrapped in plastic wrap and then in foil to prevent freezer burn.
- Pairing: Consider serving your Halloween Bark with a warm cup of cocoa or apple cider.
- Variations: Try using dark chocolate instead of milk chocolate for a richer flavor.
- Keepsakes: If you want to make it more decorative, use cookie cutters to shape the bark into fun Halloween-themed shapes!