Dry Brine Chicken
There’s something truly special about the way a well-prepared chicken can transform a meal. The magic all starts with a little technique known as dry brining, and that’s exactly what we’re diving into with this Dry Brine Chicken recipe. Imagine inviting friends over for dinner and revealing a beautifully roasted chicken, its skin perfectly crisp and golden, while the meat is succulent and bursting with flavor. This method is a game-changer, allowing the seasoning to penetrate deep into the meat, ensuring every bite is seasoned just right.
I’ve always loved cooking for my family, and there’s a certain satisfaction that comes from presenting a dish that not only looks stunning but tastes incredible too. When I first tried dry brining, I was skeptical. Could simply salting and letting the chicken rest really make that big of a difference? Spoiler alert: it does! The result is a chicken that’s not just a dish but a centerpiece, perfect for any gathering.
As you embark on this culinary journey, I encourage you to embrace the process. The Dry Brine Chicken might take a little bit of planning, but the rewards are well worth it. Whether it’s a weekend family dinner or a special occasion, this method brings out the best in your chicken. So roll up your sleeves, grab your ingredients, and let’s create something memorable!
Recipe Snapshot
1 hr 5 mins
5 mins
60 mins
Medium
350 kcal
40 g
Keto, Paleo, Whole30
20 g
Baking Sheet
Why You’ll Love This Dry Brine Chicken
The Flavor Enhancer
One of the key reasons I absolutely love the Dry Brine Chicken method is how it enhances the flavor of the chicken. The salt draws out the chicken’s natural juices, creating a brine that penetrates the meat. This results in a juicy and flavorful chicken that’s hard to resist.
Perfectly Crisp Skin
If you’re like me and crave that deliciously crispy skin, dry brining is your best friend. By allowing the chicken to rest uncovered in the fridge, the skin dries out. When it finally hits the heat, that moisture-less skin turns ultra-crispy, giving you that satisfying crunch with each bite.
Flexibility with Timing
Another reason I adore this recipe is its flexibility. You can dry brine your chicken for anywhere between 4 to 24 hours. This means you can prep it ahead of time, allowing you to focus on other dishes when it’s time to serve. No more last-minute stress!
Healthier Cooking Method
Dry brining doesn’t just make for flavorful chicken; it’s also a healthier cooking method. You’re likely to use less oil or butter since the chicken retains its moisture and flavor on its own. This way, you can indulge in a delicious meal without feeling guilty.
Versatile Cooking Options
Finally, the Dry Brine Chicken can be prepared using various cooking methods. Whether you prefer roasting, grilling, or smoking, the results are consistently delicious. You have the freedom to choose your preferred technique, making this recipe adaptable to any occasion.
Everything You Need for Dry Brine Chicken
When it comes to preparing a Dry Brine Chicken, the ingredients are simple yet effective. Each one plays a crucial role in creating a flavorful and juicy dish. The star of the show is, of course, the chicken itself, complemented beautifully by the seasoning that enhances its natural flavors.
- One 3 ½ to 4 pound whole roasting chicken, giblets removed – This is the heart of the dish. A good-quality whole chicken ensures even cooking and rich flavor.
- 4 teaspoons of coarse salt – Essential for the dry brining process, coarse salt helps draw out moisture and infuse flavor.
- 1 teaspoon ground pepper – Adds a subtle kick that elevates the overall taste of the chicken.
Making Dry Brine Chicken
Now, let’s dive into the process of making your Dry Brine Chicken. The steps are straightforward, but they yield impressive results! Follow along as we prepare this delicious dish step by step.
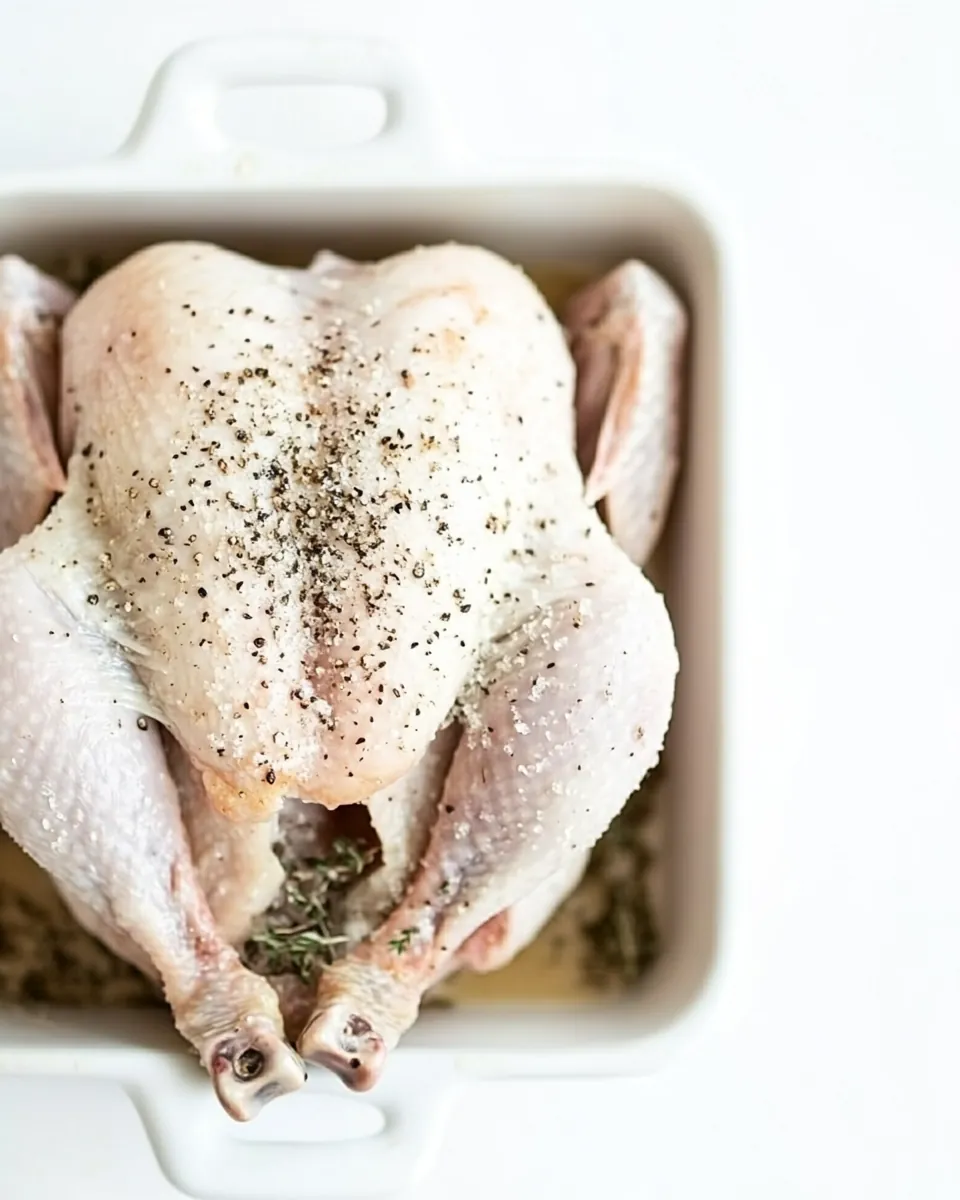
- Start by patting the chicken dry on all sides with paper towels. You want the skin to be as dry as possible before seasoning it. This step is crucial because moisture can lead to a soggy skin, which we definitely want to avoid.
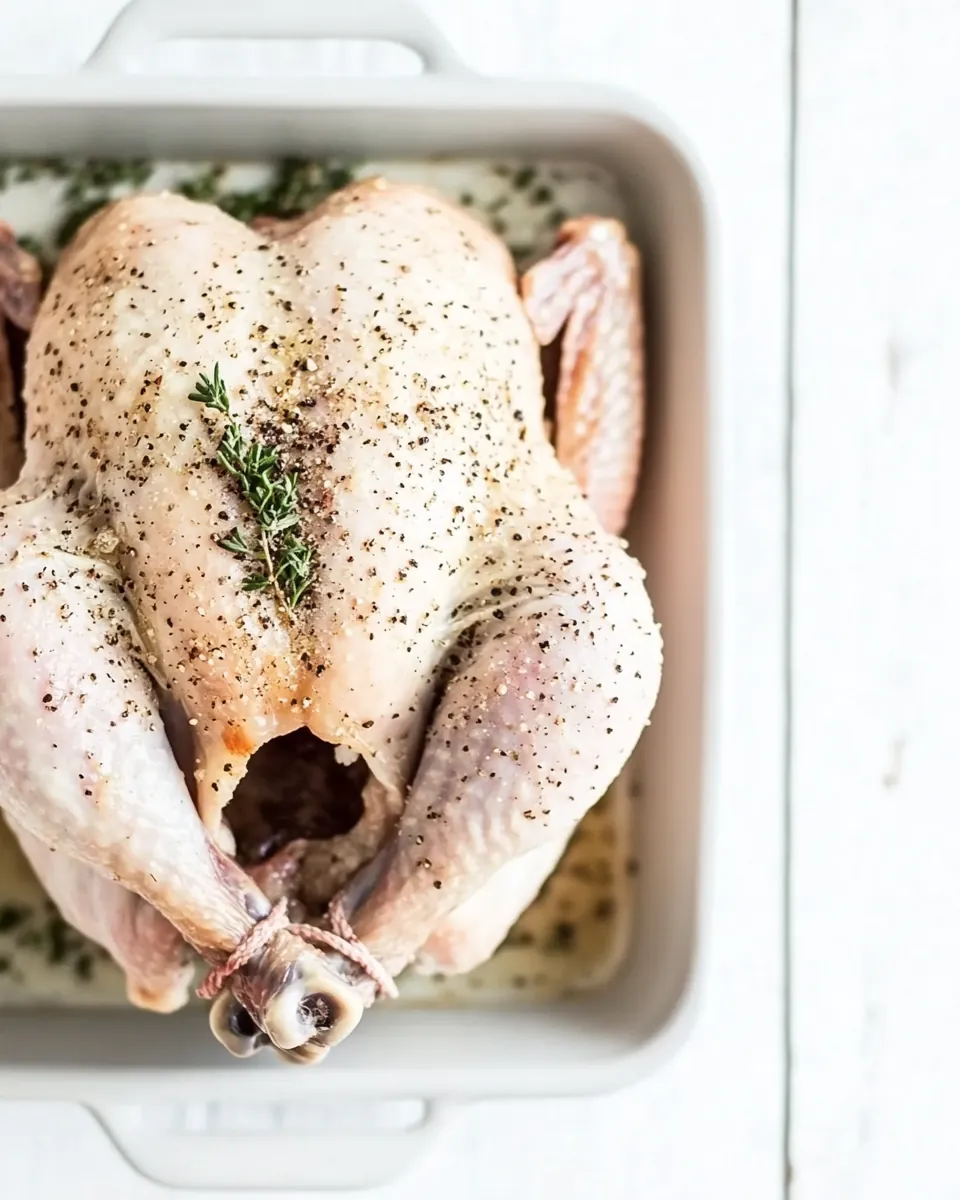
- Next, place the chicken on a rack over a sheet tray or plate. This allows the air to circulate around the bird, ensuring even drying. Now, generously season all sides and the inside cavity of the chicken with the salt and pepper. Don’t be shy – a good coating is key!
- Feel free to rub the seasoning into the skin and cavity to ensure it’s well-distributed. This is where the magic begins! The salt will start to draw out moisture and create its brine.
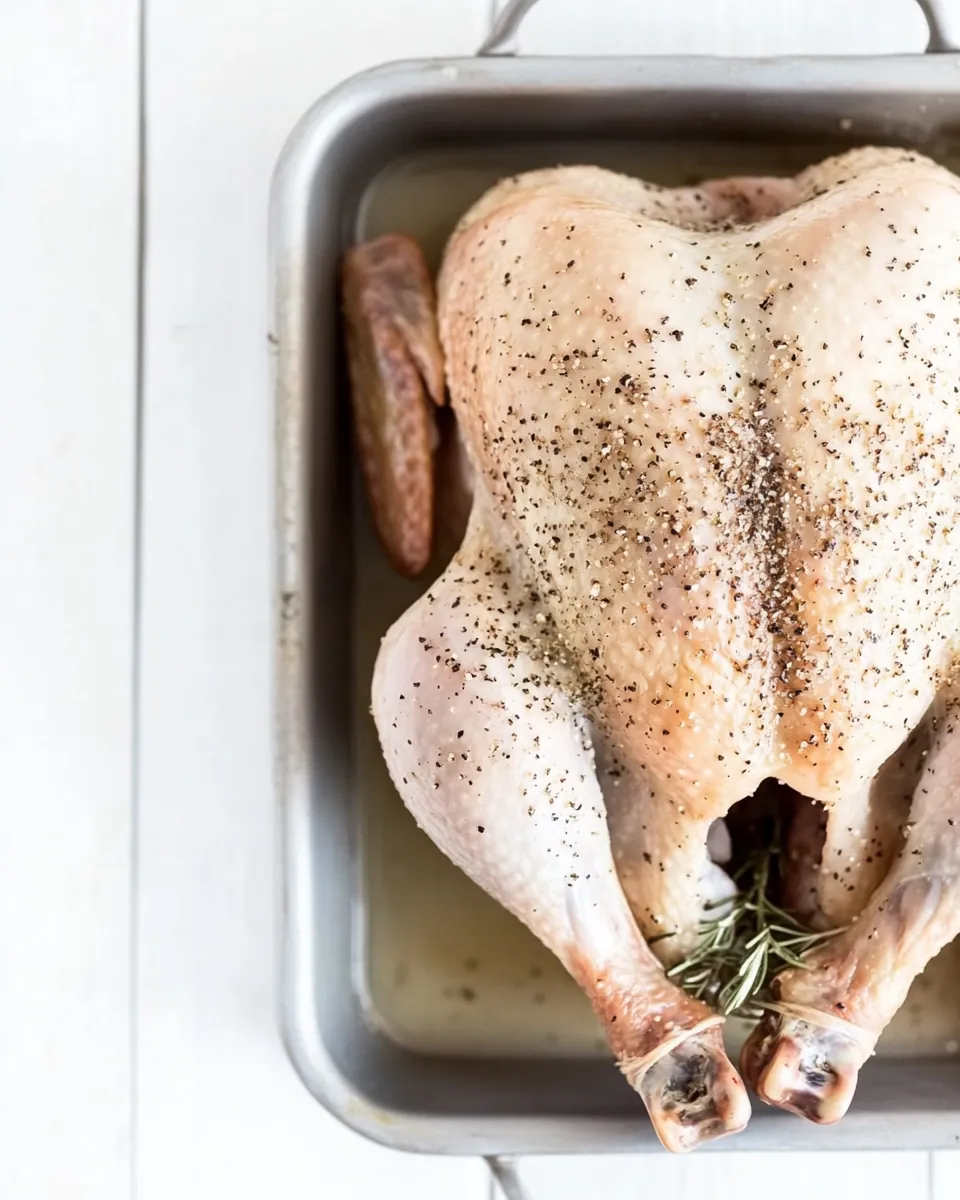
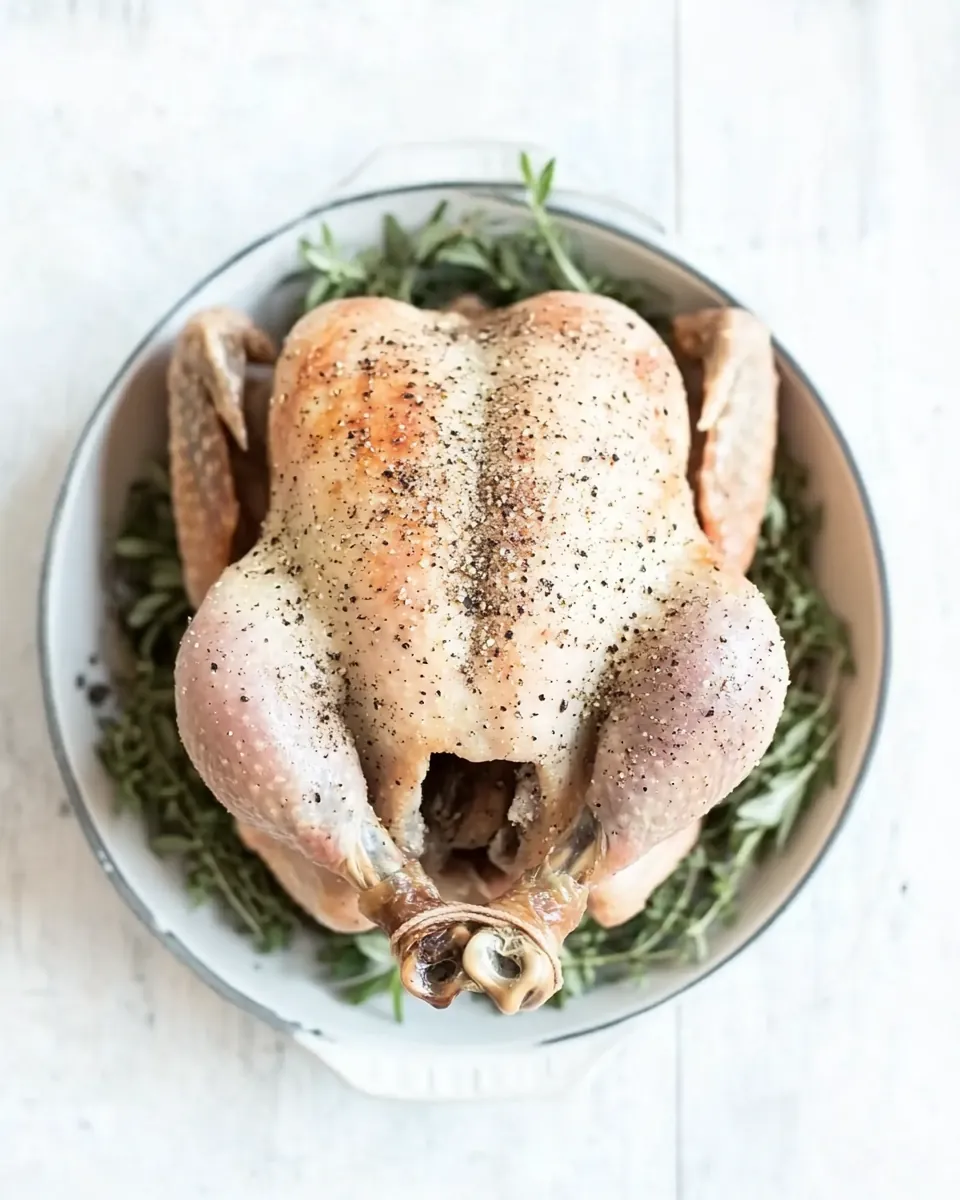
- Now comes the waiting game. Put the chicken on the rack in the fridge, uncovered, for at least 4 hours, but ideally 24 hours. This step is vital for allowing the flavors to meld and for the skin to dry out.
- Once the chicken has been dry brined, remove it from the fridge. At this point, you can choose your cooking method: roast, sear, grill, or even smoke it. Each method will yield delicious results.
Things Worth Knowing
- Always pat the chicken dry before seasoning to ensure crispy skin.
- Use coarse salt for dry brining as it helps to draw moisture effectively.
- Make sure to give the chicken enough time to brine; the longer, the better the flavor.
- For best results, let the chicken sit on a wire rack in the fridge to enhance air circulation.
Tips and Variations
As with any great recipe, there are plenty of tips and variations to consider for your Dry Brine Chicken. Here are some helpful insights:
- Storage: Store any leftover cooked chicken in an airtight container in the fridge for up to 4 days. This keeps it fresh and ready to enjoy again.
- Freezing: You can freeze the cooked chicken for up to 3 months. Just ensure it’s well-wrapped to prevent freezer burn.
- Make-Ahead: The seasoned chicken can be left to dry brine in the fridge for a maximum of 24 hours before cooking.
- Pairing: Serve the Dry Brine Chicken with your favorite side dishes, such as roasted vegetables or a fresh salad, to complete the meal.
- Cooking Methods: Don’t limit yourself to just roasting; try grilling or smoking the chicken for different flavor profiles.
What Complements This Dry Brine Chicken
When you’re ready to serve your Dry Brine Chicken, there are countless options for sides and pairings that will elevate your dining experience. Here’s a list of ideas:
- Roasted Vegetables: A medley of seasonal vegetables roasted until caramelized pairs perfectly with the chicken’s rich flavor.
- Fresh Salad: A light salad with mixed greens, cherry tomatoes, and a vinaigrette can balance the hearty chicken.
- Garlic Mashed Potatoes: Creamy mashed potatoes infused with garlic provide a comforting side that complements the chicken well.
- Rice Pilaf: Fluffy rice pilaf with herbs adds a nice texture and flavor contrast.
- Occasions: This Dry Brine Chicken is ideal for family dinners, gatherings, or even festive occasions.
FAQ
Conclusion
The Dry Brine Chicken method is truly a revelation in preparing one of the most beloved dishes. It not only enhances the flavor but also ensures the chicken remains juicy and tender throughout the cooking process. I encourage you to give this technique a try in your own kitchen. You’ll be amazed at how simple steps can result in such delicious outcomes. So gather your ingredients, embrace the process, and delight in serving your family and friends this incredible dish!
Dry Brine Chicken
Ingredients
Equipment
Method
- Start by patting the chicken dry on all sides with paper towels. You want the skin to be as dry as possible before seasoning it. This step is crucial because moisture can lead to a soggy skin, which we definitely want to avoid.
- Next, place the chicken on a rack over a sheet tray or plate. This allows the air to circulate around the bird, ensuring even drying. Now, generously season all sides and the inside cavity of the chicken with the salt and pepper. Don’t be shy – a good coating is key!
- Feel free to rub the seasoning into the skin and cavity to ensure it's well-distributed. This is where the magic begins! The salt will start to draw out moisture and create its brine.
- Now comes the waiting game. Put the chicken on the rack in the fridge, uncovered, for at least 4 hours, but ideally 24 hours. This step is vital for allowing the flavors to meld and for the skin to dry out.
- Once the chicken has been dry brined, remove it from the fridge. At this point, you can choose your cooking method: roast, sear, grill, or even smoke it. Each method will yield delicious results.
Notes
- Tip 1: One of the most important lessons I’ve learned from dry brining poultry is not to rush the process. After massaging the seasonings into the meat, I leave the chicken to dry brine for a minimum of 4 hours or a maximum of 24 hours. This gives the salt and pepper plenty of time to work their way into the meat and deliver the most flavorful, succulent bird.
- Tip 2: The amount of salt you use will depend on the weight of the chicken. I always aim for about 1 teaspoon of kosher salt per pound of chicken. This keeps the balance of flavors just right, whether you’re brining a whole bird or individual pieces.
- Tip 3: If the chicken skin is rubbery after cooking, this means it likely wasn’t dry going into the oven. Always pat the raw chicken dry with paper towels before seasoning, and keep the chicken uncovered and on a wire rack set over a sheet tray while brining to help the air circulate.
- Tip 4: Rinsing washes away the flavor and risks spreading bacteria around your sink.
- Tip 5: The seasoned chicken can be left in the fridge to brine for up to 24 hours before cooking.
- Tip 6: After cooking, let the chicken cool to room temperature, then store it in an airtight container in the fridge for up to 4 days or in the freezer for up to 3 months.
- Tip 7: Add the leftover chicken to a baking dish with a splash of water or broth, cover it with foil, and bake at 350ºF for 20 to 30 minutes or until it’s warmed through.