Homemade Lemon Bars
When I think of warm, sunny days and the sweetness of summer, nothing brings those memories to life quite like Homemade Lemon Bars. This delightful treat captures the essence of a perfect afternoon spent outside, with laughter and the smell of freshly cut grass in the air. I remember the first time I made these lemon bars; the tangy aroma of fresh lemons filled my kitchen, making it impossible not to smile. They are the ultimate balance of sweetness and tartness, reminding me of my grandmother’s kitchen, where we spent countless afternoons baking together. I can still hear her laughter as we mixed the ingredients, the anticipation growing as we waited for them to bake to golden perfection. These Homemade Lemon Bars are more than just a dessert; they’re a slice of nostalgia, a way to bring back those cherished moments. So, let’s dive into creating a batch that will fill your home with that same warmth.
Recipe Snapshot
55 mins
15 mins
40 mins
Medium
180 kcal
2 g
Gluten-Free, Low FODMAP
8 g
Nielsen-Massey Pure Vanilla Bean Paste, with Gift Box, 4 Ounces, 8-Inch Square Glass Baking Dish
Why Try This Homemade Lemon Bars
They’re Refreshingly Bright
One of the things I absolutely adore about Homemade Lemon Bars is the way they invigorate your senses. The first bite takes you on a journey of vibrant flavors, with the fresh lemon juice and zest bursting forth, awakening your taste buds. It’s a ray of sunshine on your tongue!
Perfect for Any Occasion
From backyard barbecues to holiday gatherings, these lemon bars are always a hit. They’re incredibly versatile, serving as the perfect dessert for any event. I’ve brought them to potlucks, and they’re often the first to disappear, with everyone asking for the recipe.
A Quick and Easy Dessert
No one wants to spend hours in the kitchen, and thankfully, Homemade Lemon Bars come together quickly. With just a few simple ingredients, you can whip them up in no time. It’s one of those recipes that’s perfect for both novice bakers and seasoned pros.
Classic Comfort Food
There’s something comforting about a classic dessert, and these lemon bars fit the bill perfectly. They take me back to my childhood, where desserts were made from scratch, and the process of baking was just as sweet as the final product. Each bite feels like a hug from the past.
Simple Ingredients, Big Flavor
What I love most is how simple ingredients like butter, eggs, and fresh lemon juice come together to create something so delicious. It’s a reminder that great things can come from the basics, and it inspires creativity in the kitchen.
They’re Eye-Catching
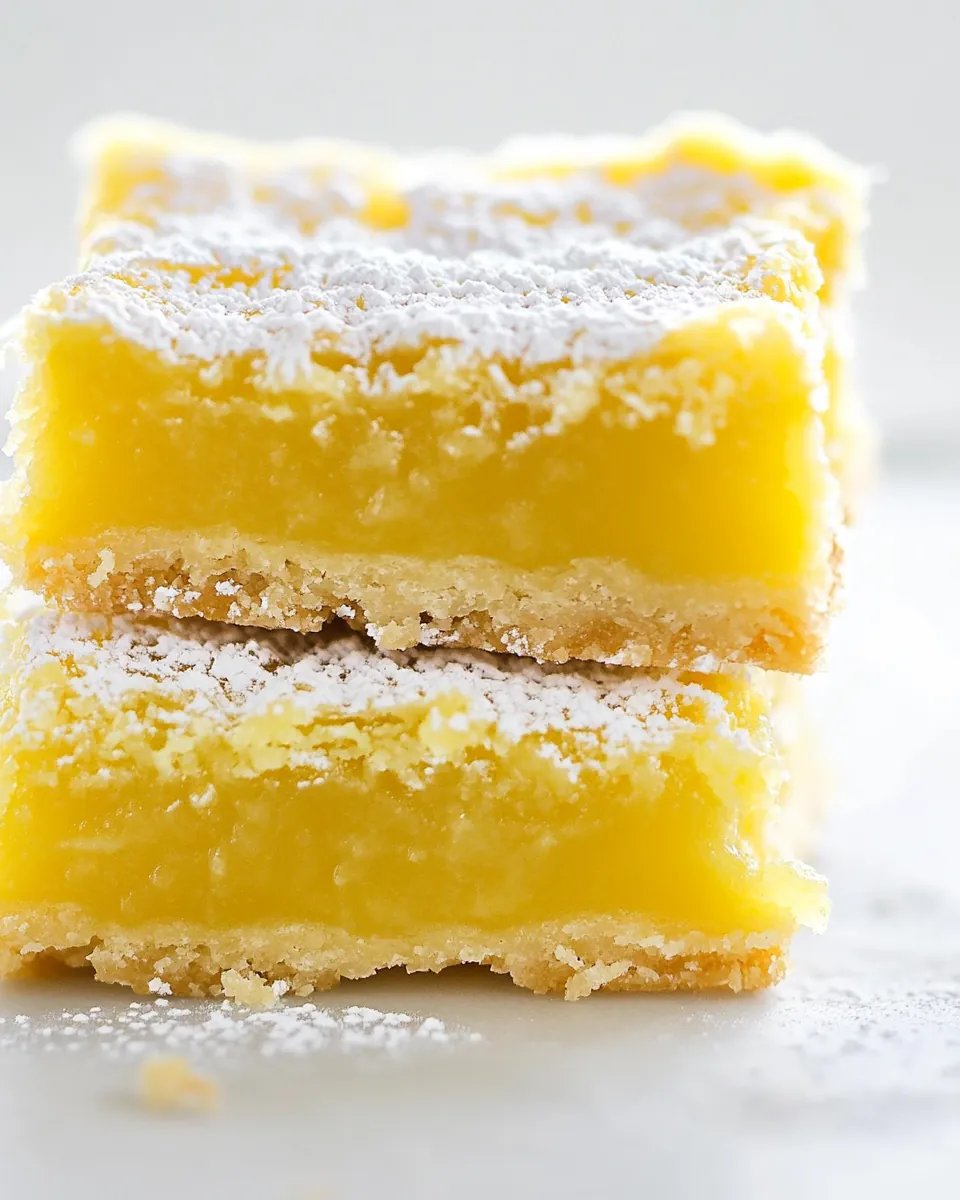
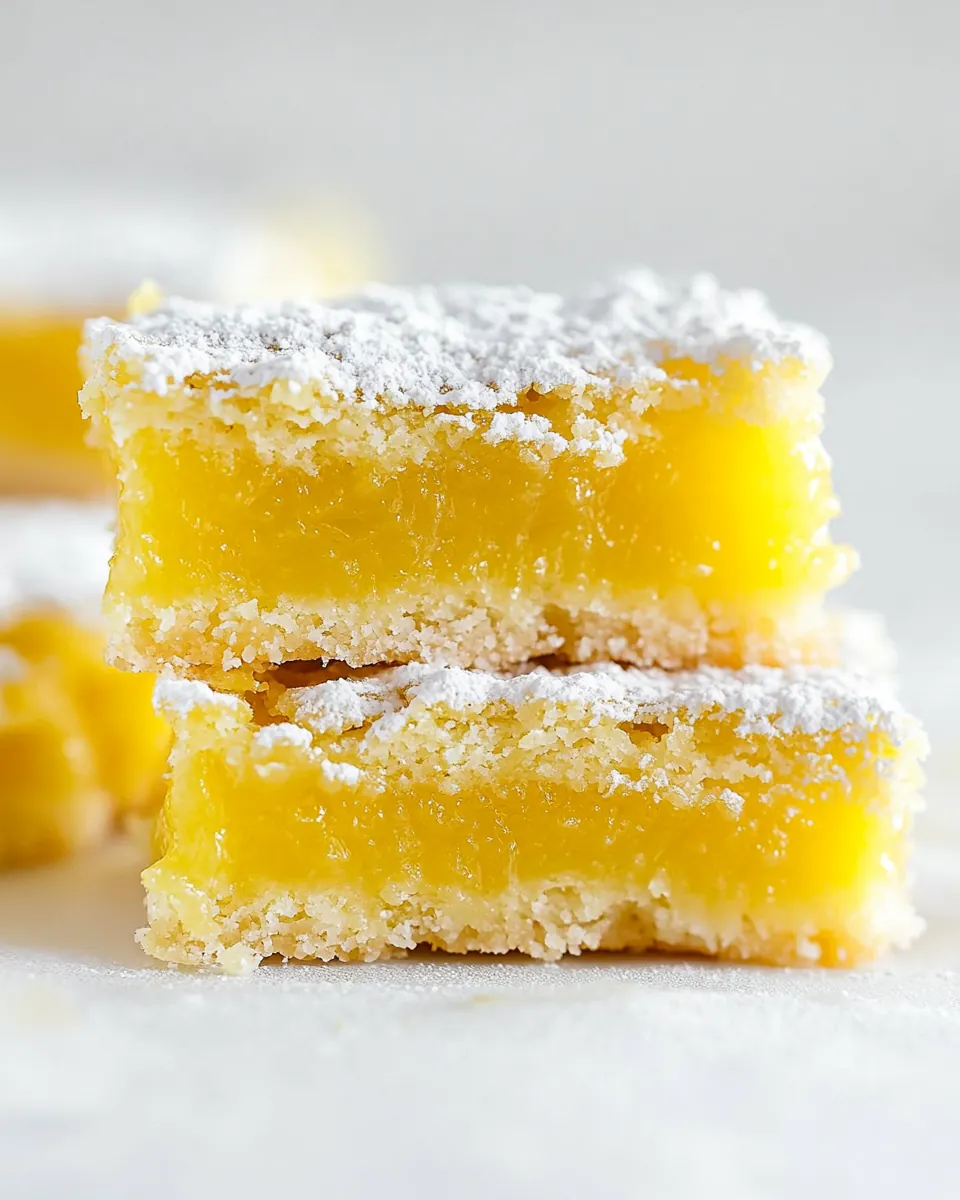
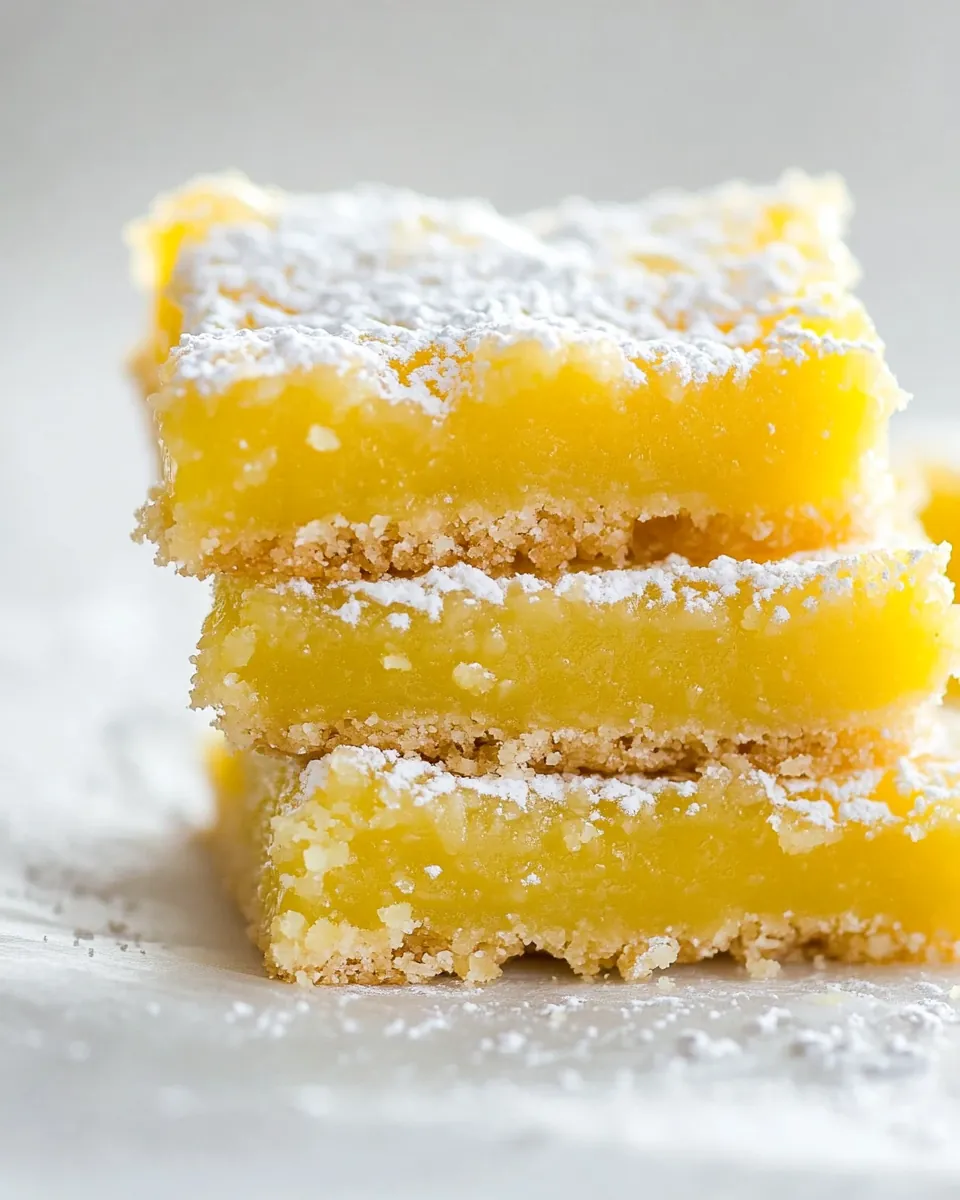
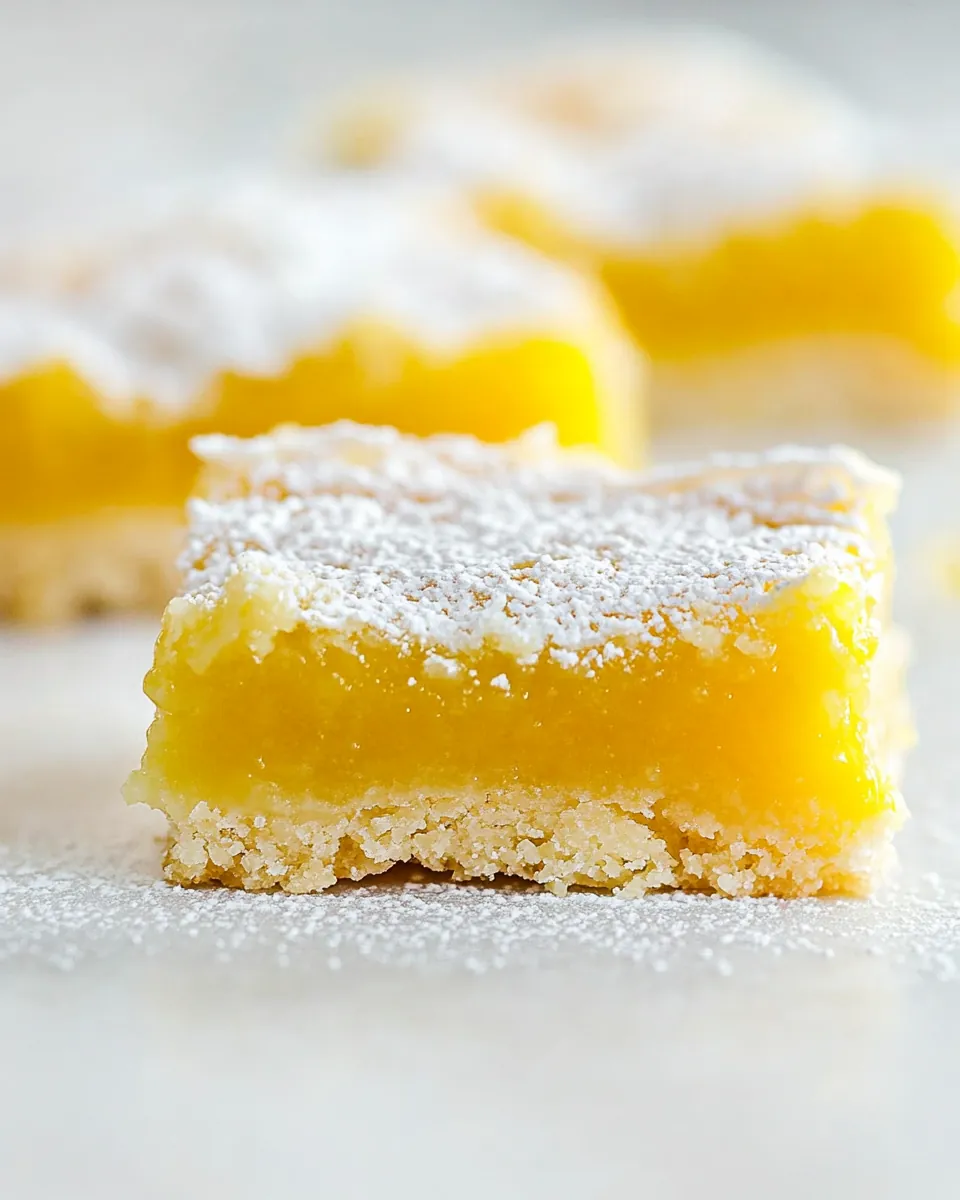
Let’s be honest, Homemade Lemon Bars are beautiful! The bright yellow filling topped with a dusting of powdered sugar makes them look as good as they taste. They are a feast for the eyes, making them a stunning addition to any dessert table.
Ingredient List for Homemade Lemon Bars
When it comes to creating Homemade Lemon Bars, the ingredients play a crucial role in bringing out that zesty flavor. Each element works harmoniously to deliver a delightful experience. The star of the show is undoubtedly the fresh lemon juice, providing that signature tang that makes these bars so refreshing. Paired with unsalted butter for richness and granulated sugar for sweetness, you have a balanced combination that keeps you coming back for more.
- 4 ounces unsalted butter, room temperature – The foundation of the crust, this butter adds richness and flavor. Make sure it’s softened for easy mixing.
- 1/4 cup powdered sugar – This gives the crust a sweet, melt-in-your-mouth texture that perfectly complements the tart filling.
- 1 cup all-purpose flour – Essential for the crust, it provides structure while allowing for a tender bite.
- 1/4 teaspoon kosher salt – A pinch of salt enhances the flavors, balancing the sweetness of the sugar.
- 1 cup granulated sugar – This is the star of the filling, adding sweetness to counteract the tartness of the lemons.
- 2 large eggs – These provide the necessary structure and help bind the filling together.
- 1/3 cup fresh lemon juice – Freshly squeezed is best, as it gives the bars their bright, tangy flavor that everyone loves.
- 2 tablespoons grated lemon zest – This brings additional depth of flavor, enhancing the lemony taste.
- 2 tablespoons all-purpose flour – This helps thicken the filling, ensuring it sets up nicely.
Step by Step Guide for Homemade Lemon Bars
Baking Homemade Lemon Bars is a delightful process that is as rewarding as it is delicious. Follow these steps, and you’ll have a batch of lemon bars that will impress everyone. Let’s get started!
- Preheat your oven to 350 degrees F. Line an 8×8-inch square baking pan with parchment paper, allowing some overhang for easy removal later. This ensures your lemon bars come out perfectly every time.
- In the bowl of an electric mixer, add butter and powdered sugar. Beat together until the mixture is pale in color and fluffy, about 3 minutes. You want it to look light and airy, which will create a tender crust.
- Next, add 1 cup of all-purpose flour and kosher salt to the bowl. Mix just until the dough comes together. It might look crumbly at first, but it will form a cohesive dough. This should take a few minutes.
- Firmly press the dough into the bottom of your prepared pan. Make sure to keep the dough an even thickness throughout. This will give you a nice, uniform crust.
- Bake the crust for about 20 minutes, or until it’s lightly browned. You’ll want it to have a nice golden color. Once done, remove it from the oven and let it cool while you prepare the filling.
- In a clean mixing bowl, combine granulated sugar and eggs. Beat until smooth and creamy, about 2 minutes. This is where the magic begins, as the eggs will bring the filling together.
- Add in the fresh lemon juice and lemon zest. Stir to combine. The aroma will transport you right to summer, even if it’s chilly outside!
- Now, fold in the 2 tablespoons of all-purpose flour gently. This will help thicken the filling, ensuring it sets perfectly.
- Pour the lemon filling over the cooled crust. Spread it evenly to ensure every bite is delicious. Bake for an additional 20 minutes, or until the filling is set and slightly firm to the touch.
- Once baked, remove the pan from the oven and allow it to cool completely. After cooling, use the parchment overhang to lift the lemon bars out of the pan. Cut into squares and dust with powdered sugar before serving. These bars are best enjoyed the day they are made but can be stored in the refrigerator for up to two days.
Things Worth Knowing
- Use Fresh Lemons: Always opt for fresh lemon juice and zest. The flavor is incomparable to bottled versions.
- Cooling Time: Allow the bars to cool completely before cutting. This ensures clean edges and prevents the filling from spilling.
- Dust Right Before Serving: For the best presentation, dust with powdered sugar just before serving. This keeps it from dissolving into the filling.
- Experiment with Citrus: Try using lime or orange juice for a different twist on these bars while keeping the same basic recipe.
How to Switch It Up
Variations keep baking exciting! Here are some creative ways to switch up your Homemade Lemon Bars. Feel free to experiment!
- Add Fruit: Mix in fresh berries, like raspberries or blueberries, for a fruity twist. The combination of flavors will surprise and delight your taste buds.
- Make it Vegan: Substitute the eggs with flaxseed meal or a commercial egg replacer. Use vegan butter to keep the recipe friendly for everyone.
- Graham Cracker Crust: Instead of a traditional crust, use crushed graham crackers mixed with melted butter for a shortcut that adds a delicious flavor.
- Infuse with Herbs: Try adding fresh herbs like basil or thyme to the filling for an unexpected and sophisticated flavor profile.
- Chill Out: For a refreshing summer dessert, chill the bars before serving. The colder temperature can enhance the lemon flavor.
Serving This Homemade Lemon Bars
When it comes to enjoying Homemade Lemon Bars, the serving options are as delightful as the bars themselves. Here are some ideas to get you started:
- Perfect for Picnics: Bring along lemon bars for a picnic. They’re easy to pack, and their refreshing flavor pairs beautifully with a warm day.
- Sweet Treat for Lunch: Pack them in lunch boxes as a sweet surprise. They’re a fabulous way to brighten up a midday meal.
- After Dinner Delight: Serve them as a light dessert after a heavy meal. Their bright flavor offers a refreshing contrast that cleanses the palate.
- Seasonal Celebrations: These bars are perfect for spring gatherings, like Easter brunch or a garden party. Their sunny color adds to the festive atmosphere.
- Storage Tips: Store any leftover bars in an airtight container in the refrigerator. They’ll keep fresh for up to two days, maintaining their delicious taste.
- Serving with Tea: Pair these bars with a warm cup of tea or coffee. It’s a delightful combination that enhances the experience.
FAQ
Conclusion
Homemade Lemon Bars are a delightful combination of sweet and tart flavors, making them a favorite among dessert lovers. They are not just a treat but also a wonderful way to evoke warm memories of sunny days. I encourage you to try making these lemon bars in your own kitchen. You’ll enjoy the process and the delicious results!
Homemade Lemon Bars
Ingredients
Equipment
Method
- Preheat your oven to 350 degrees F and line an 8×8-inch baking pan with parchment paper.
- In the bowl of an electric mixer, add butter and powdered sugar. Beat together until pale and fluffy, about 3 minutes.
- Add 1 cup of all-purpose flour and kosher salt. Mix until the dough comes together. It may look crumbly initially.
- Firmly press the dough into the bottom of the prepared pan evenly.
- Bake the crust for about 20 minutes until lightly browned.
- In a clean mixing bowl, combine granulated sugar and eggs. Beat until smooth and creamy, about 2 minutes.
- Add in fresh lemon juice and lemon zest. Stir to combine gently.
- Fold in the 2 tablespoons of all-purpose flour until fully combined.
- Pour the filling over the cooled crust and spread evenly.
- Bake for another 20 minutes until the filling is set.
- Let cool completely before removing from the pan and cutting into squares.
Notes
- Storage: Store leftovers in an airtight container in the fridge for up to two days.
- Freezing: These bars can be frozen for up to three months. Wrap them well and thaw in the fridge before serving.
- Pairing: Serve with a scoop of vanilla ice cream for a delightful contrast.
- Variations: Consider adding a layer of fresh berries on top for a colorful twist.
- Presentation: For a special touch, garnish with mint leaves to elevate the presentation.