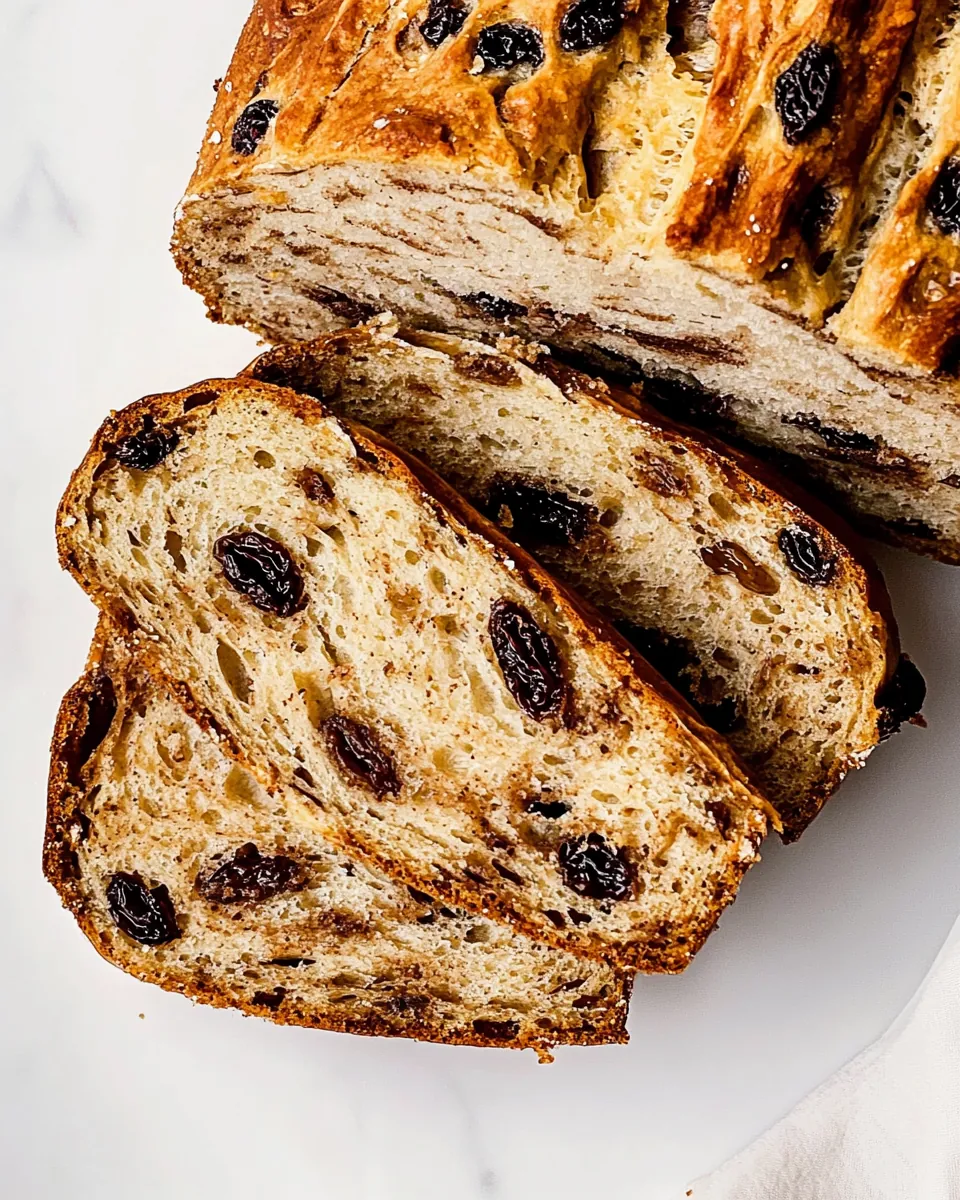
No Knead Cinnamon Raisin Bread
The moment I first tasted No Knead Cinnamon Raisin Bread, I knew I had stumbled upon something magical. It was a chilly autumn afternoon, and I was in search of comfort. The warm aroma of cinnamon wafted through the air, filling my kitchen with a sense of nostalgia. My grandmother used to make a similar loaf, and every bite transported me back to her cozy home, where we’d gather around the table, sharing stories and laughter. This recipe is not just about bread; it’s about connection and warmth. With a few simple ingredients, you can create a loaf that not only tastes heavenly but also brings people together.
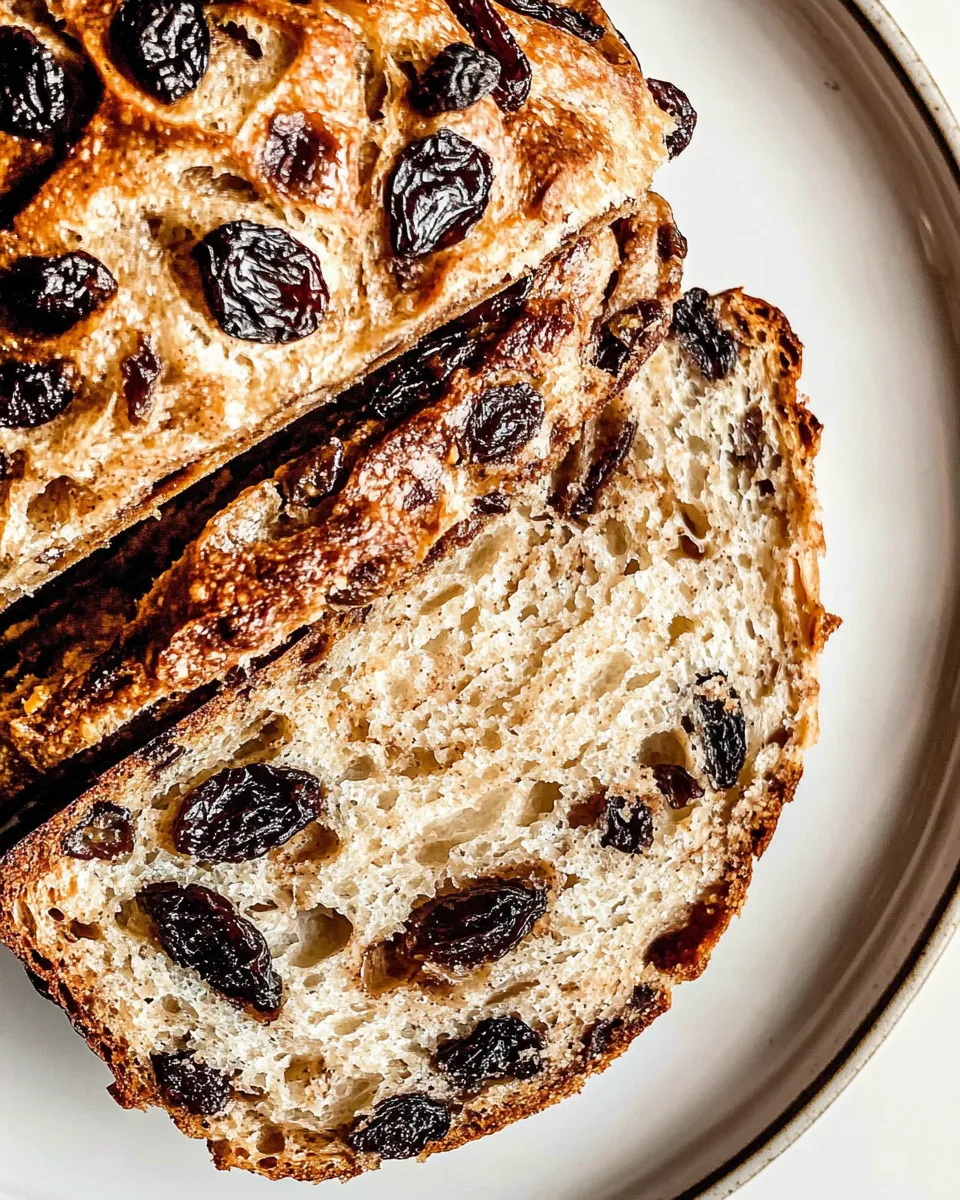
What’s truly remarkable about this No Knead Cinnamon Raisin Bread is its simplicity. You don’t need to be a baking expert to achieve that perfect crust and soft, chewy interior. This method allows the dough to rise slowly, developing deep flavors as it rests. Ideal for a lazy weekend morning or as a delightful addition to any brunch, it’s the kind of bread that you’ll want to share. So, let’s embark on this journey of baking together!
Recipe Snapshot
55 mins
10 mins
45 mins
Medium
190 kcal
4 g
Vegan, Gluten-Free, AIP
1 g
Le Creuset Enameled Cast Iron Signature Round Dutch Oven, 5.5 qt., Meringue, Danish Dough Whisk, Parchment Paper, CUTCO Bread Knife 9.8″ High Carbon Stainless
Why You’ll Love This No Knead Cinnamon Raisin Bread
1. Simplicity is Key
The beauty of No Knead Cinnamon Raisin Bread lies in its uncomplicated process. You mix, let it rise, and then bake. No fancy equipment or techniques required! This makes it accessible to everyone, whether you’re a seasoned baker or just starting out.
2. Time Equals Flavor
Allowing the dough to rise for an extended period enhances flavor and texture significantly. The long fermentation process adds complexity that you simply can’t achieve with quick methods. It’s a lesson in patience that pays off deliciously!
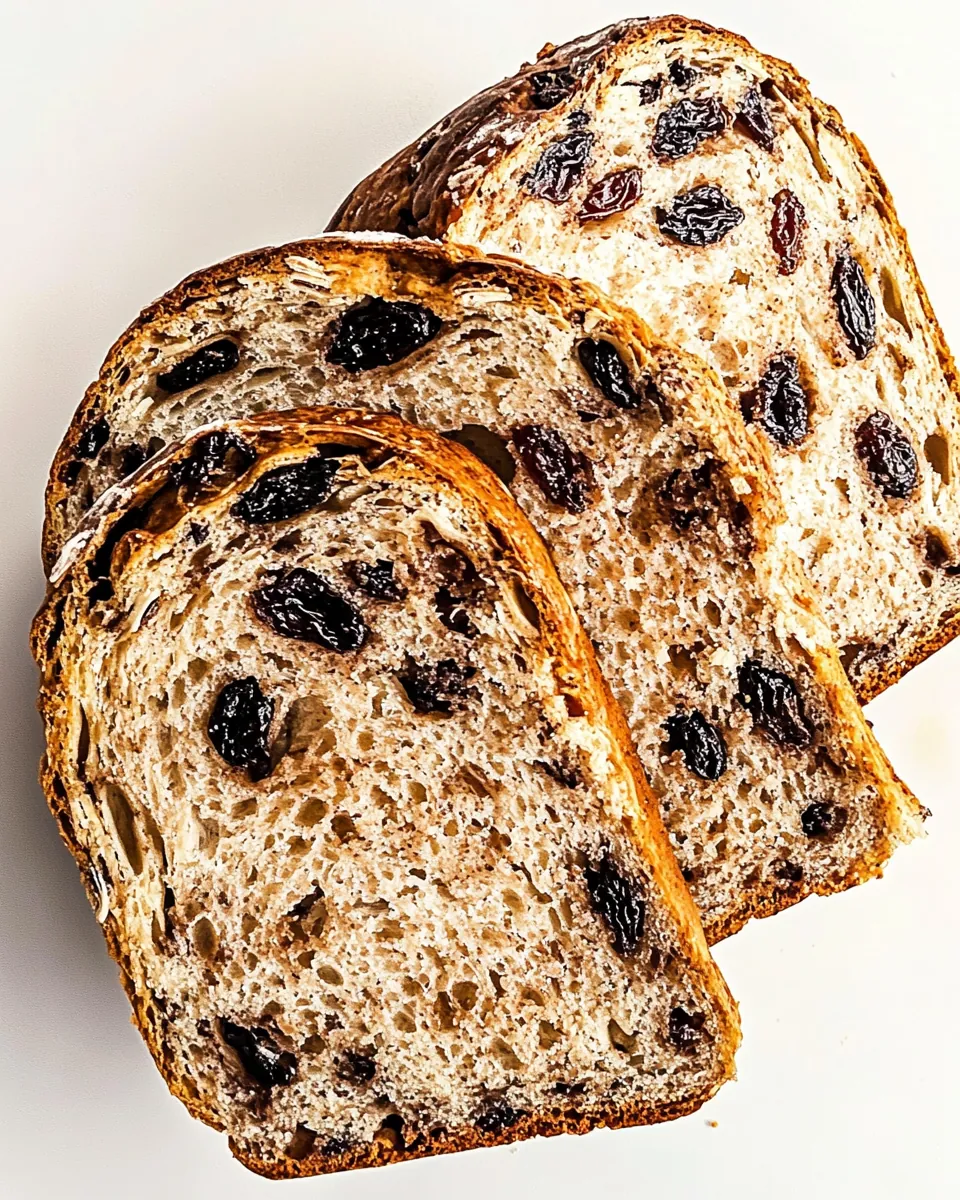
3. Perfect for Sharing
This recipe yields a generous loaf, making it perfect for gatherings. Slice it up and serve it as a delightful accompaniment to coffee or tea. Watching people enjoy your homemade bread is one of the most rewarding experiences of baking.
4. Versatile and Adaptable
While the cinnamon and raisins are a classic combination, feel free to experiment. Add nuts, or swap out the raisins for cranberries. This recipe allows for creativity, so you can make it your own!
5. The Aroma is Irresistible
There’s something enchanting about the smell of baking bread. The aroma of cinnamon mingling with warm dough will entice everyone in your home. It’s a scent that brings comfort and a sense of home, ensuring that your kitchen feels inviting.
6. Healthier Indulgence
Making bread at home means you control the ingredients. You can use whole grain flour or organic ingredients to create a healthier version of your favorite treat. Enjoy a slice without the guilt!
What to Gather for No Knead Cinnamon Raisin Bread
Gathering the right ingredients is essential for making the perfect No Knead Cinnamon Raisin Bread. Each component plays a vital role in creating a loaf that is not only delicious but also has a wonderful texture. The key players include the basic ingredients like flour and water, but it’s the addition of cinnamon and raisins that make this bread truly special, elevating it from ordinary to extraordinary.
- 3 cups all-purpose flour – This is the base of your bread, providing structure and a chewy texture.
- 1 teaspoon salt – Essential for flavor and controlling yeast activity.
- ½ teaspoon active dry yeast – This ingredient helps the dough rise, creating a light and airy loaf.
- 1 tablespoon cinnamon (ground) – Adds warmth and sweetness, making this bread a cozy treat.
- 1 cup raisins – These little gems provide bursts of sweetness throughout the loaf.
- 1½ cups water (lukewarm, 105°F to 115°F) – Activates the yeast and hydrates the dough for better texture.
- 3 tablespoons brown sugar – Enhances the sweetness and adds a rich flavor.
The Process for Making No Knead Cinnamon Raisin Bread
Making No Knead Cinnamon Raisin Bread is a delightful experience that brings the joy of baking into your home. You’ll be surprised at how straightforward the process is. Just follow these steps and you’ll soon have a loaf that is a feast for the senses!
- In a big bowl, mix together the flour, salt, yeast, cinnamon, and raisins. Use a whisk to ensure everything is evenly combined. This mix will form the base of your dough, so it’s important to get it right from the beginning.
- Slowly pour the lukewarm water into the bowl. Using a spatula or a wooden spoon, gently mix the ingredients until they are well incorporated. The dough will be sticky and shaggy, which is perfectly normal! You don’t have to activate the yeast beforehand as it will do its magic during the rising process.
- Cover the bowl tightly with plastic wrap and let it sit at room temperature for 12 to 18 hours. The longer you let it rise, the better the flavor will develop. This is where the magic happens!
- After the rising time is up, preheat your oven to 450°F. Place your cast iron pot in the oven as it heats up. The pot needs to be extremely hot to create a beautiful crust.
- Once the oven is preheated, carefully remove the pot using oven mitts. Remove the lid and set it aside. Be cautious as it will be very hot!
- Flour your hands generously and sprinkle some flour over the dough. Gently remove the dough from the bowl and place it on a well-floured work surface. Flatten the dough slightly and sprinkle the brown sugar over it.
- Fold the dough over itself a few times to mix in the brown sugar. Form the dough into a ball, using more flour if necessary to prevent sticking. This shaping step is crucial for achieving that round loaf shape.
- Place the dough ball onto a piece of parchment paper. The parchment will make it easier to transfer the dough into the hot pot.
- Using the parchment paper, lift the ball of dough and drop it into the hot cast iron pot. Cover it with the lid and place it back in the oven.
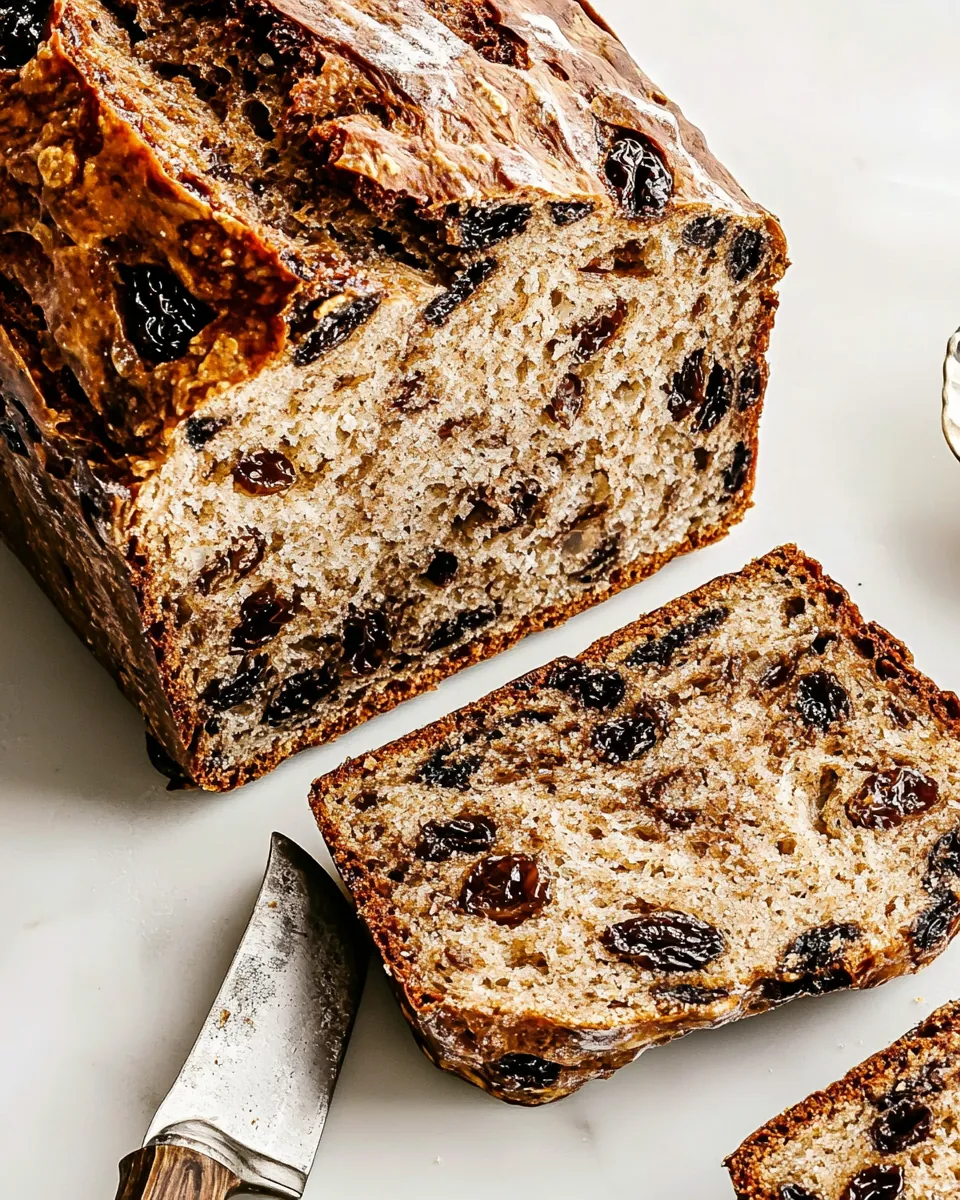
- Bake for 30 minutes with the lid on. This steam creates a lovely crust. After 30 minutes, carefully remove the lid and bake for an additional 15 to 20 minutes, or until the bread is golden brown. You’ll know it’s done when it has a beautiful color and sounds hollow when tapped.
- Finally, remove the bread from the pot; it should fall out easily. Let it cool completely on a wire rack before slicing. Slicing too soon will result in a gummy texture, so patience is key!
Things Worth Knowing
- Use fresh yeast: If your yeast is past its prime, your loaf won’t rise properly. Always double check that expiration date.
- Water temp matters: Lukewarm is key (105°F to 115°F / 41°C to 46°C). Too hot and you’ll kill the yeast.
- Long rise = better bread: Overnight is best, but you can use 1 teaspoon yeast and shorten the rise to 4–6 hours if needed.
- Sticky dough is normal: Resist the urge to add more flour. Just flour your hands when shaping.
- Let it cool completely: Slicing while warm results in a gummy texture. Let it cool so the crumb sets properly.
Recipe Notes about No Knead Cinnamon Raisin Bread
This No Knead Cinnamon Raisin Bread is a wonderful recipe, but there are always tips to enhance your baking experience. Here are some important notes to consider:
- Storage: Store any leftovers in an airtight container at room temperature. It will stay fresh for up to three days.
- Freezing: This bread freezes wonderfully! Wrap it tightly in plastic wrap, then in aluminum foil, and freeze for up to three months. Just thaw at room temperature before enjoying.
- Pairing: This bread pairs beautifully with butter or cream cheese. Try it toasted with a drizzle of honey for a delightful breakfast treat!
- Serving Suggestions: Consider serving this bread at brunch with fresh fruit and coffee or as a sweet addition to any holiday gathering.
- Variations: Feel free to add nuts or other dried fruits for extra flavor and texture!
Pairing Suggestions for No Knead Cinnamon Raisin Bread
Finding the right accompaniments for your No Knead Cinnamon Raisin Bread can elevate your meal. Here are some ideas to consider:
- Breakfast Pairing: Enjoy slices of this bread toasted with butter and a sprinkle of cinnamon sugar for a delightful morning treat.
- Brunch Centerpiece: Serve it alongside yogurt, fresh fruits, and granola for a balanced brunch spread.
- Snack Option: It makes a great afternoon snack paired with a cup of tea or coffee.
- Seasonal Treat: Perfect for holiday gatherings, this bread can be served as a sweet option during Thanksgiving or Christmas.
- Storage Tips: Keep any leftover bread in a sealed bag to maintain its freshness; it’s a treat you won’t want to waste!
FAQ
Conclusion
The No Knead Cinnamon Raisin Bread is truly a delightful recipe that combines simplicity with incredible flavor. It’s the perfect way to enjoy a cozy afternoon, whether you savor it on its own or with a touch of butter. I encourage you to give this recipe a try; you’ll find that the process is just as enjoyable as the end result. Baking this bread not only fills your home with a warm aroma but also creates wonderful moments shared with family and friends.
No Knead Cinnamon Raisin Bread
Ingredients
Equipment
Method
- In a big bowl, mix together the flour, salt, yeast, cinnamon, and raisins. Use a whisk to ensure everything is evenly combined. This mix will form the base of your dough, so it’s important to get it right from the beginning.
- Slowly pour the lukewarm water into the bowl. Using a spatula or a wooden spoon, gently mix the ingredients until they are well incorporated. The dough will be sticky and shaggy, which is perfectly normal! You don’t have to activate the yeast beforehand as it will do its magic during the rising process.
- Cover the bowl tightly with plastic wrap and let it sit at room temperature for 12 to 18 hours. The longer you let it rise, the better the flavor will develop. This is where the magic happens!
- After the rising time is up, preheat your oven to 450°F. Place your cast iron pot in the oven as it heats up. The pot needs to be extremely hot to create a beautiful crust.
- Once the oven is preheated, carefully remove the pot using oven mitts. Remove the lid and set it aside. Be cautious as it will be very hot!
- Flour your hands generously and sprinkle some flour over the dough. Gently remove the dough from the bowl and place it on a well-floured work surface. Flatten the dough slightly and sprinkle the brown sugar over it.
- Fold the dough over itself a few times to mix in the brown sugar. Form the dough into a ball, using more flour if necessary to prevent sticking. This shaping step is crucial for achieving that round loaf shape.
- Place the dough ball onto a piece of parchment paper. The parchment will make it easier to transfer the dough into the hot pot.
- Using the parchment paper, lift the ball of dough and drop it into the hot cast iron pot. Cover it with the lid and place it back in the oven.
- Bake for 30 minutes with the lid on. This steam creates a lovely crust. After 30 minutes, carefully remove the lid and bake for an additional 15 to 20 minutes, or until the bread is golden brown. You’ll know it’s done when it has a beautiful color and sounds hollow when tapped.
- Finally, remove the bread from the pot; it should fall out easily. Let it cool completely on a wire rack before slicing. Slicing too soon will result in a gummy texture, so patience is key!
Notes
- Use fresh yeast: If your yeast is past its prime, your loaf won’t rise properly. Always double check that expiration date.
- Water temp matters: Lukewarm is key (105°F to 115°F / 41°C to 46°C). Too hot and you’ll kill the yeast.
- Long rise = better bread: Overnight is best, but you can use 1 teaspoon yeast and shorten the rise to 4–6 hours if needed.
- Sticky dough is normal: Resist the urge to add more flour. Just flour your hands when shaping.
- Let it cool completely: Slicing while warm results in a gummy texture. Let it cool so the crumb sets properly.