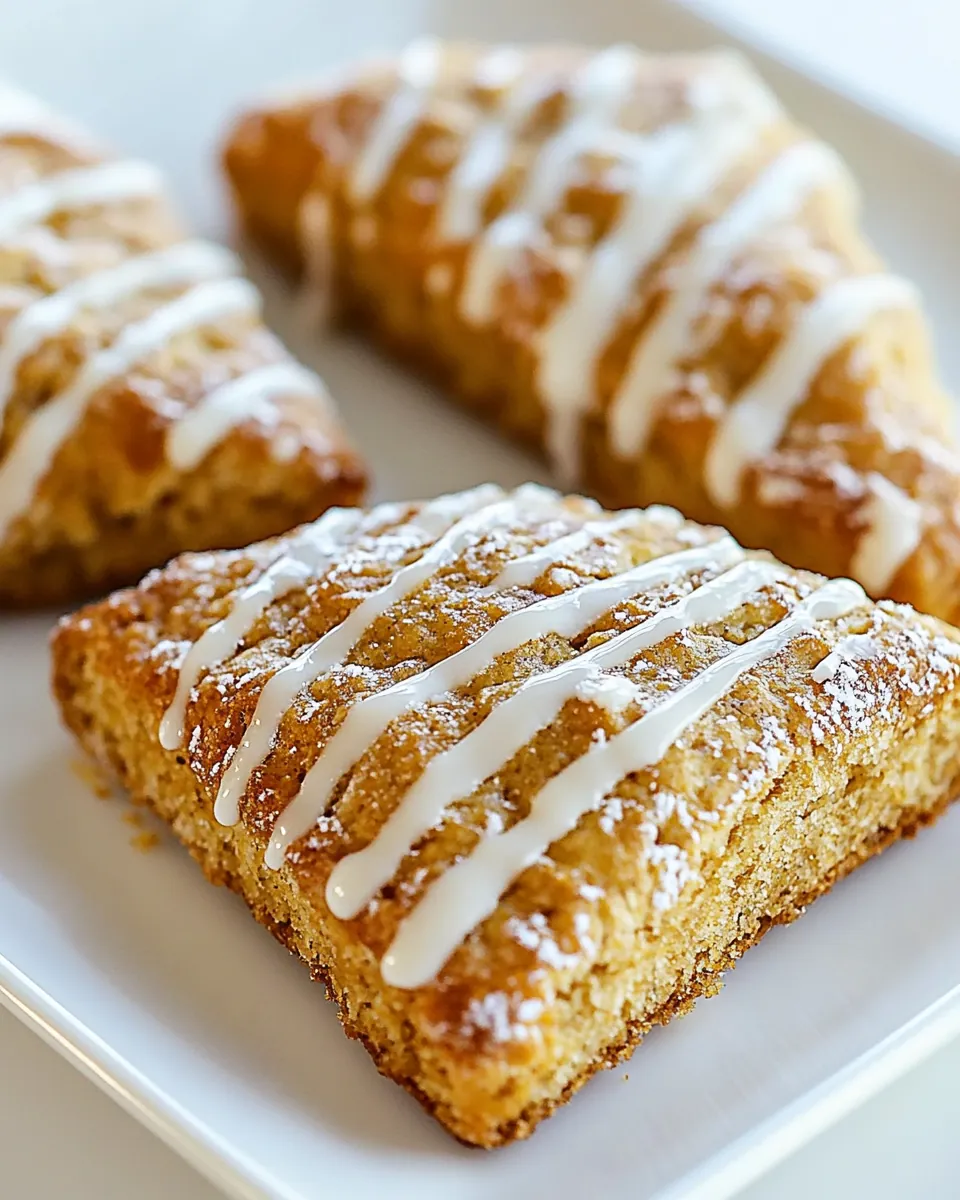
Pumpkin Scones
There’s something magical about the scent of warm Pumpkin Scones wafting through the kitchen, especially as the leaves start to change and fall settles in. I remember the first time I made these delightful treats; it was a crisp autumn afternoon, and the vibrant colors outside inspired me to bring that warmth into my home. As I mixed the ingredients, the spices danced in the air, promising a perfect balance of sweetness and spice. Each bite is a comforting reminder of cozy evenings spent with loved ones, chatting over a cup of tea or coffee. These Pumpkin Scones are not just a recipe; they encapsulate the essence of fall and make every gathering feel special. Whether you’re enjoying them for breakfast or serving them at a gathering, they are sure to bring smiles to everyone’s faces.
Recipe Snapshot
40 mins
15 mins
25 mins
Medium
250 kcal
3 g
Gluten-Free, Low FODMAP
11 g
Glass Mixing Bowl Set (3 piece), Pastry Cutter, Aluminum Baking Sheet (2 pack), Basting and Pastry Brush
Why This Pumpkin Scones Shines
1. They’re Perfectly Moist
One of the standout features of these Pumpkin Scones is their incredible moisture. The addition of canned pumpkin keeps the scones from drying out, creating a tender crumb that melts in your mouth. Unlike other scones that can often be crumbly and overly dry, these stay soft and enjoyable, making them a wonderful choice for anyone—especially during the fall season.
2. Versatile and Customizable
You can easily make these Pumpkin Scones your own! Feel free to add in your favorite mix-ins, whether that’s chocolate chips, nuts, or even a pinch of ginger for an extra kick. The base recipe is adaptable, allowing you to tailor it to your preferences while still being delicious.
3. The Aroma is Irresistible
From the moment you start mixing the ingredients, the aroma of cinnamon and pumpkin spice fills the air. Baking these scones is an experience in itself, as the delightful fragrance beckons everyone to the kitchen. I guarantee that your family and friends will be curious and excited to taste the sugary treats coming from the oven!
4. An Easy Baking Project
If you’re new to baking or looking for a simple yet rewarding project, these Pumpkin Scones are an excellent choice. The steps are straightforward, making it easy to follow along, and the results are impressive. You’ll feel accomplished serving these beautiful scones at your next gathering.
5. Perfect for Any Occasion
These scones aren’t just for breakfast. They make a fantastic treat for brunch, an afternoon snack, or even a sweet addition to your Thanksgiving dessert table. Their versatility means you can enjoy them year-round, but they truly shine in the fall.
6. Great for Sharing
There’s something special about sharing homemade treats with loved ones. Whether you’re bringing them to a friend’s house, serving them at a family gathering, or simply enjoying them with your household, these Pumpkin Scones are sure to be a hit. Their inviting flavors and pretty presentation make them perfect for sharing.
What’s In This Pumpkin Scones

When it comes to creating the perfect Pumpkin Scones, each ingredient plays a crucial role. The combination of warm spices, sweet pumpkin, and buttery goodness makes for a symphony of flavors that work harmoniously together. The ingredients are simple yet effective, showcasing the natural sweetness of pumpkin while keeping the scones light and fluffy.
- 2 ¾ cups all-purpose flour: This forms the base of the scones, providing structure while remaining tender.
- 1 tablespoon baking powder: This helps the scones rise, creating that light texture we all love.
- 1 teaspoon cinnamon (ground): Adds warmth and depth to the flavor profile, making every bite cozy.
- 1 teaspoon pumpkin pie spice: Enhances the pumpkin flavor and brings that quintessential fall spice blend.
- ¾ teaspoon salt: Balances the sweetness and enhances the overall flavor of the scones.
- ½ cup butter (frozen): When grated into the dough, it creates flaky layers that melt in your mouth.
- ⅔ cup canned pumpkin: The star of the show, it adds moisture and a rich, sweet taste.
- 2 large eggs: Binds the ingredients together and adds richness.
- ½ cup brown sugar: Provides sweetness and moisture, melding perfectly with the pumpkin.
- 1 teaspoon vanilla: A hint of vanilla rounds out the flavors beautifully.
- milk (for brushing): Gives the scones a lovely golden color when baked.
- sugar (for sprinkling): A finishing touch that adds sweetness and crunch.
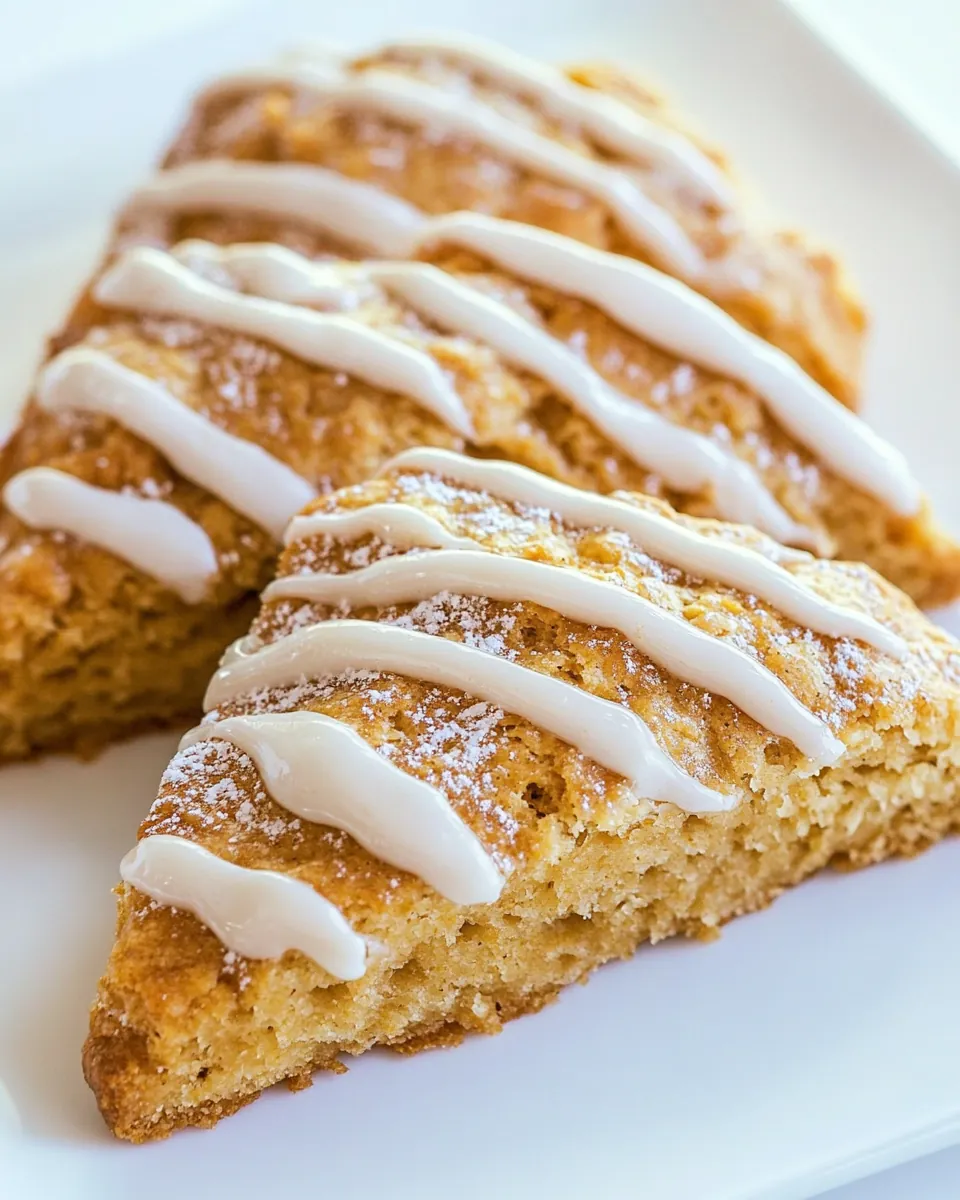
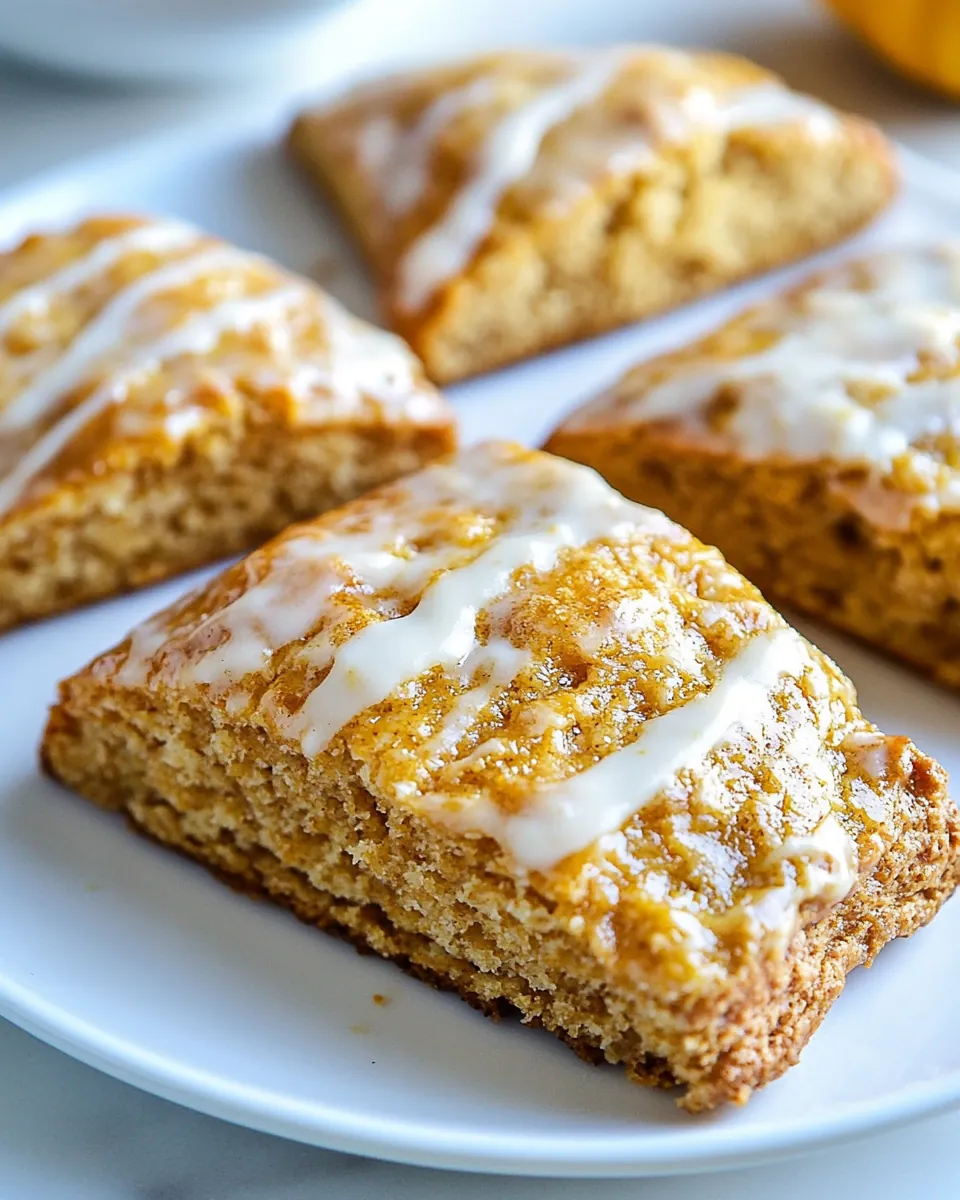
- 1 cup icing sugar: Used to create a sweet glaze that elevates the scones even further.
- 2 tablespoons milk: Mixed with icing sugar for a drizzle that gives the scones a polished look.
- ½ teaspoon pumpkin pie spice: Additional spice to enhance the glaze’s flavor.
Instructions for Pumpkin Scones
Making these Pumpkin Scones is an enjoyable process that fills your kitchen with delightful aromas. Let’s dive into the steps to create these tasty treats together!
- Preheat your oven to 400°F (200°C). Prepare two baking sheets by lining them with parchment paper to prevent sticking and ensure even baking.
- In a large mixing bowl, combine 2 ¾ cups of all-purpose flour, 1 tablespoon of baking powder, 1 teaspoon of cinnamon, 1 teaspoon of pumpkin pie spice, and ¾ teaspoon of salt. Make sure they are well mixed to evenly distribute the leavening agent and spices.
- Grate the ½ cup of frozen butter using a box grater. Add the grated butter to the flour mixture. Using a pastry cutter or a fork, cut the butter into the flour mixture until it resembles coarse crumbs. The pieces of butter should be about the size of peas, which will help make your scones flaky.
- If you wish to add any other ingredients like chocolate chips or nuts, now is the time to do so. This is a great moment to customize your scones!
- In a separate bowl, whisk together ⅔ cup of canned pumpkin, 2 large eggs, ½ cup of brown sugar, and 1 teaspoon of vanilla until smooth. This mixture will add moisture and flavor to your scones.
- Pour the pumpkin mixture over the flour mixture and stir gently until everything is just combined. Be careful not to overmix; you want the dough to remain somewhat sticky.
- Transfer the dough onto a lightly floured work surface. Knead it gently a couple of times until it comes together. Avoid over-kneading, as this can make the scones tough.
- Form the dough into two disks, each about ¾-inch thick. Cut each disk into 8 equal smaller scones, or you can choose to form one large disk for larger scones.
- Place the cut scones onto the prepared baking sheets, ensuring they are spaced at least 2 inches apart. Brush the tops of the scones with a bit of milk and sprinkle some sugar on top for added sweetness and crunch.
- If you plan to add a glaze later, you can skip the sugar sprinkle. Bake the scones in the oven for 20 to 25 minutes, or until a toothpick inserted into the center comes out clean and the tops are lightly golden brown.
- While the scones are baking, prepare the glaze. In a bowl, whisk together the ingredients for each glaze until smooth. Once the scones are out of the oven and cooled slightly, drizzle the glaze over the warm scones.
Substitutions and Tips
Every baker loves a good tip! Here are some insights to help you master these Pumpkin Scones.
- Storage: Store any leftover pumpkin scones in an airtight container at room temperature for 1 to 2 days or in the fridge for up to 3 days.
- Freezing: These scones can be easily frozen! Wrap them individually in plastic wrap and place them in a ziplock bag for up to 3 months.
- Texture Tips: Ideal scone dough is wet and somewhat sticky. If it’s too dry, the scones won’t rise properly. Conversely, if they’re too wet, they will be tough and chewy once baked.
- Adjusting for Environment: Keep in mind that things like temperature and humidity can affect the recipe. Tweak amounts as necessary to get the right texture.
- Experiment with Flavors: Don’t hesitate to play with the spices! A bit of nutmeg or ginger can add a lovely twist to your scones.
- Serving Suggestions: These scones are perfect with a cup of tea or coffee, making them an ideal snack for afternoon gatherings.
Pairing Suggestions for Pumpkin Scones
When serving Pumpkin Scones, it’s all about creating the perfect experience. Here are some fantastic pairing suggestions:
- Tea Time: Serve these scones with a pot of warm tea, such as chai or Earl Grey, to enhance the cozy flavors.
- Breakfast Delight: Pair them with a side of fresh fruit or yogurt for a delightful breakfast spread.
- Brunch Favorite: Incorporate the scones into a fall-themed brunch, perhaps alongside pumpkin spice lattes and a selection of cheeses.
- Festive Gatherings: These scones make a lovely addition to holiday celebrations, especially around Thanksgiving, where they can complement your dessert table.
- Storage Tips: If you have leftovers, remember to store them properly to maintain freshness. A simple airtight container will do the trick!
- Seasonal Enjoyment: Enjoy these scones during fall, as they truly capture the essence of the season with their flavors and aromas.
FAQ
Conclusion
These Pumpkin Scones are truly a special treat that combines the flavors of fall into a delightful baked good. They’re perfect for sharing and make any occasion feel festive. I encourage you to give this recipe a try and experience the warmth and comfort they bring to your table. You won’t regret it!
Pumpkin Scones
Ingredients
Equipment
Method
- Preheat your oven to 400°F (200°C). Prepare two baking sheets by lining them with parchment paper to prevent sticking and ensure even baking.
- In a large mixing bowl, combine 2 ¾ cups of all-purpose flour, 1 tablespoon of baking powder, 1 teaspoon of cinnamon, 1 teaspoon of pumpkin pie spice, and ¾ teaspoon of salt. Make sure they are well mixed to evenly distribute the leavening agent and spices.
- Grate the ½ cup of frozen butter using a box grater. Add the grated butter to the flour mixture. Using a pastry cutter or a fork, cut the butter into the flour mixture until it resembles coarse crumbs. The pieces of butter should be about the size of peas, which will help make your scones flaky.
- If you wish to add any other ingredients like chocolate chips or nuts, now is the time to do so. This is a great moment to customize your scones!
- In a separate bowl, whisk together ⅔ cup of canned pumpkin, 2 large eggs, ½ cup of brown sugar, and 1 teaspoon of vanilla until smooth. This mixture will add moisture and flavor to your scones.
- Pour the pumpkin mixture over the flour mixture and stir gently until everything is just combined. Be careful not to overmix; you want the dough to remain somewhat sticky.
- Transfer the dough onto a lightly floured work surface. Knead it gently a couple of times until it comes together. Avoid over-kneading, as this can make the scones tough.
- Form the dough into two disks, each about ¾-inch thick. Cut each disk into 8 equal smaller scones, or you can choose to form one large disk for larger scones.
- Place the cut scones onto the prepared baking sheets, ensuring they are spaced at least 2 inches apart. Brush the tops of the scones with a bit of milk and sprinkle some sugar on top for added sweetness and crunch.
- If you plan to add a glaze later, you can skip the sugar sprinkle. Bake the scones in the oven for 20 to 25 minutes, or until a toothpick inserted into the center comes out clean and the tops are lightly golden brown.
- While the scones are baking, prepare the glaze. In a bowl, whisk together the ingredients for each glaze until smooth. Once the scones are out of the oven and cooled slightly, drizzle the glaze over the warm scones.
Notes
- Tip 1: Store any leftover pumpkin scones in an airtight container at room temperature for 1 to 2 days or in the fridge for up to 3 days.
- Tip 2: These scones can be easily frozen! Wrap them individually in plastic wrap and place them in a ziplock bag for up to 3 months.
- Tip 3: Ideal scone dough is wet and somewhat sticky. If it's too dry, the scones won’t rise properly. Conversely, if they're too wet, they will be tough and chewy once baked.
- Tip 4: Keep in mind that things like temperature and humidity can affect the recipe. Tweak amounts as necessary to get the right texture.
- Tip 5: Don't hesitate to play with the spices! A bit of nutmeg or ginger can add a lovely twist to your scones.