Go Back
Easy Strawberry Banana Bread

Easy Strawberry Banana Bread

Experience the delightful combination of sweet strawberries and ripe bananas in this Easy Strawberry Banana Bread. It’s moist, flavorful, and perfect for any occasion. Savor a slice for breakfast or as a light dessert tonight!
Prep Time 10 minutes
Cook Time 1 hour
Total Time 1 hour 10 minutes
Servings: 8 servings
Course: Breakfast
Cuisine: American
Calories: 210

Ingredients
  

  • cups mashed very ripe bananas (from about 3 medium)
  • ½ cup unsalted butter (melted and slightly cooled)
  • 2 large eggs (lightly beaten)
  • 1 teaspoon vanilla extract
  • 1 cup all-purpose flour
  • 1 cup whole-wheat flour
  • ½ cup sugar
  • 1 teaspoon baking soda
  • 1 teaspoon cinnamon
  • ½ teaspoon salt
  • 2 cups finely diced strawberries (stems discarded)

Equipment

  • Mixing Bowl
  • Storage Containers
  • Measuring Cups

Method
 

  1. Preheat the oven to 350 degrees F and grease a 9×5-inch loaf pan with nonstick spray. Make sure to cover the bottom and sides well to prevent sticking.
  2. In a large mixing bowl, add the mashed bananas, butter, eggs, and vanilla extract. Stir everything together until fully combined. The mixture should be somewhat thick and creamy.
  3. Next, add the all-purpose and whole-wheat flour, sugar, baking soda, cinnamon, and salt to the banana mixture. Stir until just combined; it's fine if there are a few lumps. Overmixing can make the bread tough.
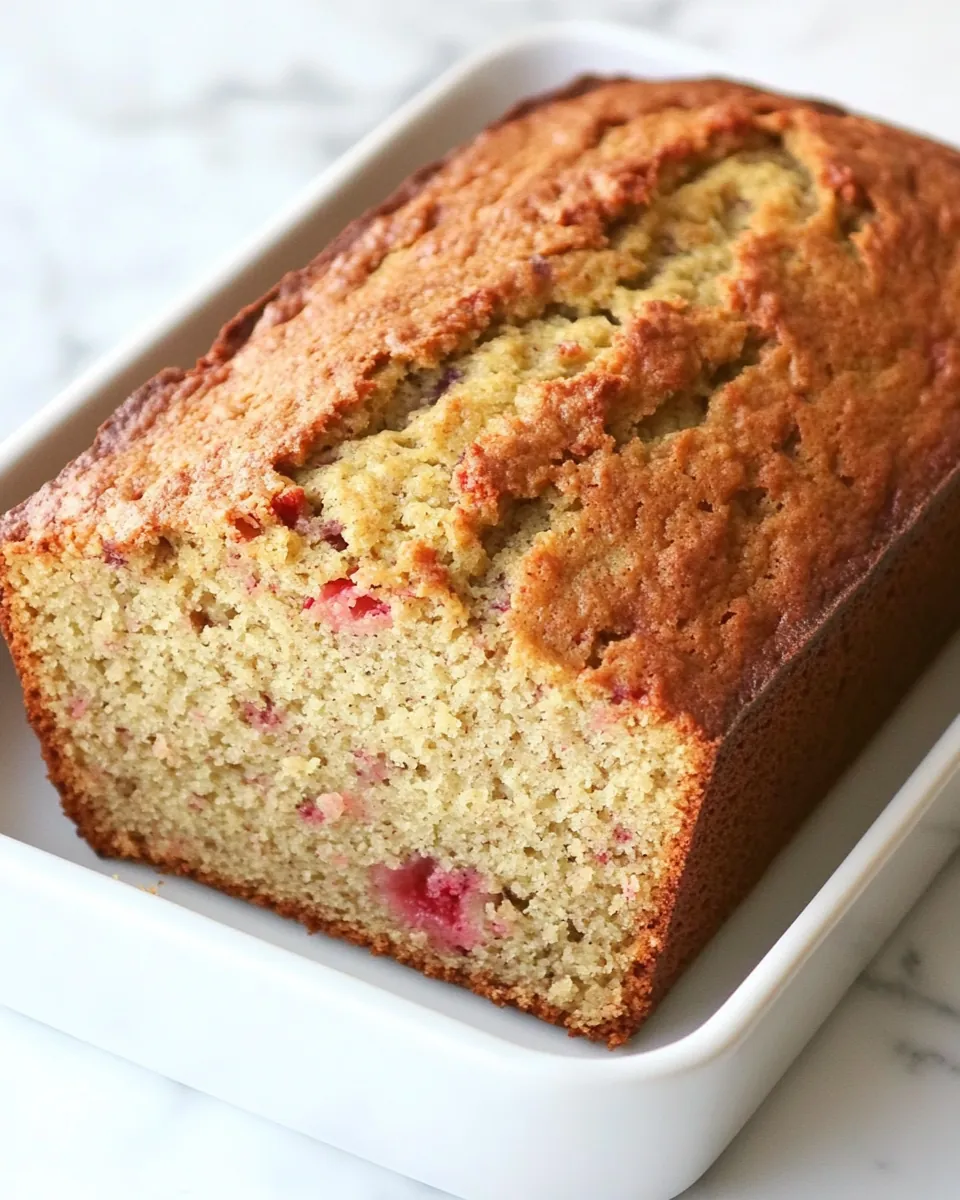
  4. Gently fold in the finely diced strawberries. Be careful not to crush them too much; you want to maintain some texture in the bread.
  5. Pour the batter into the prepared loaf pan, smoothing the top with a spatula so it’s even. This helps ensure even baking.
  6. Place the loaf pan in the preheated oven and bake for 55 to 60 minutes. The bread is done when it's golden brown and a cake tester inserted into the center comes out clean.
  7. Once baked, let the bread cool in the pan for about 5 minutes. This allows it to firm up slightly, making it easier to remove.
  8. Carefully remove the bread from the pan and let it cool on a wire rack completely. This step is crucial for the best texture.
  9. Once cooled, slice the bread and serve. It’s delicious on its own or with a smear of nut butter or cream cheese.

Notes

  • Storage: Store any leftovers in an airtight container at room temperature for up to 3 days or in the fridge for 5 days.
  • Freezing: Slice and freeze the bread in a zip-top storage bag for up to 6 months. Thaw in the fridge or at room temperature.
  • Pairing: Serve with a dollop of yogurt or a smear of nut butter for added protein.
  • Flavor Variations: Toss in some chopped nuts for a crunchy texture or mix in some dark chocolate chips for a sweet twist.
  • Gluten-Free: Substitute the flours with a gluten-free blend for a gluten-free version.